The Toast developer portal allows you to easily view and manage your credentials and scopes, access technical documentation, and connect with the Toast integration community.
To use the developer portal, you need:
-
To be a Toast integration partner
-
A production Toast developer portal account
Note
Your developer portal account is created by the Toast Developer Relations team during onboarding, once you are approved as a Toast integration partner. For more information, see Integration partnership process.
For developer portal account assistance, visit the Toast Integrations Community Forum and open a support request with the Toast Developer Relations team.
Once your developer portal account is created by the Toast Partner Connect team, you will receive a welcome email from Toast with a link to activate and set up your account.
To activate your developer portal account
-
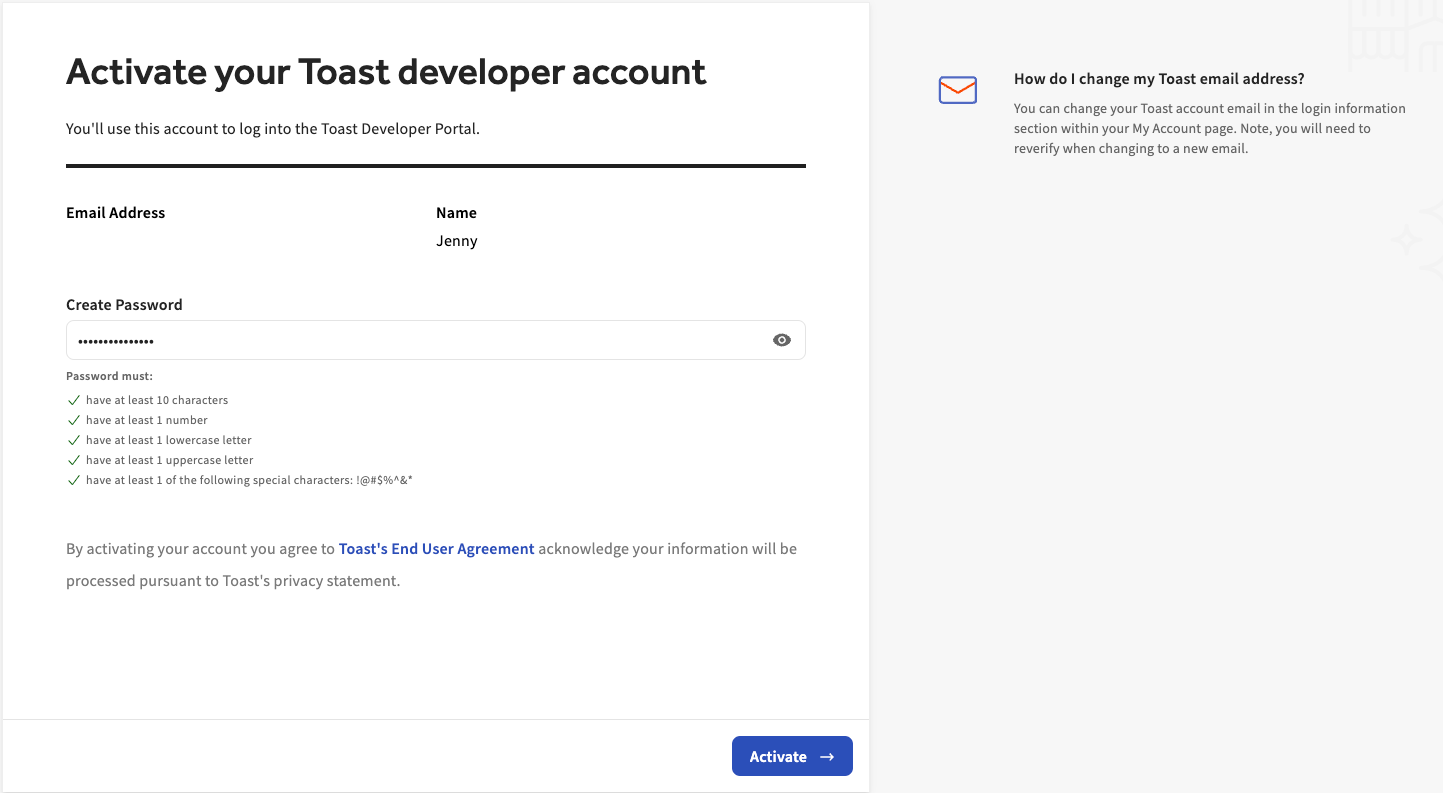
In the developer portal account welcome email, select the Set up your account button. This opens the account activation page in the Toast developer portal.
-
Enter your password and select the Activate button to save your password and activate your developer portal account.
-
Select the Login now button. Your account is activated and you are logged into the developer portal. You can also log in to the developer portal through this link.
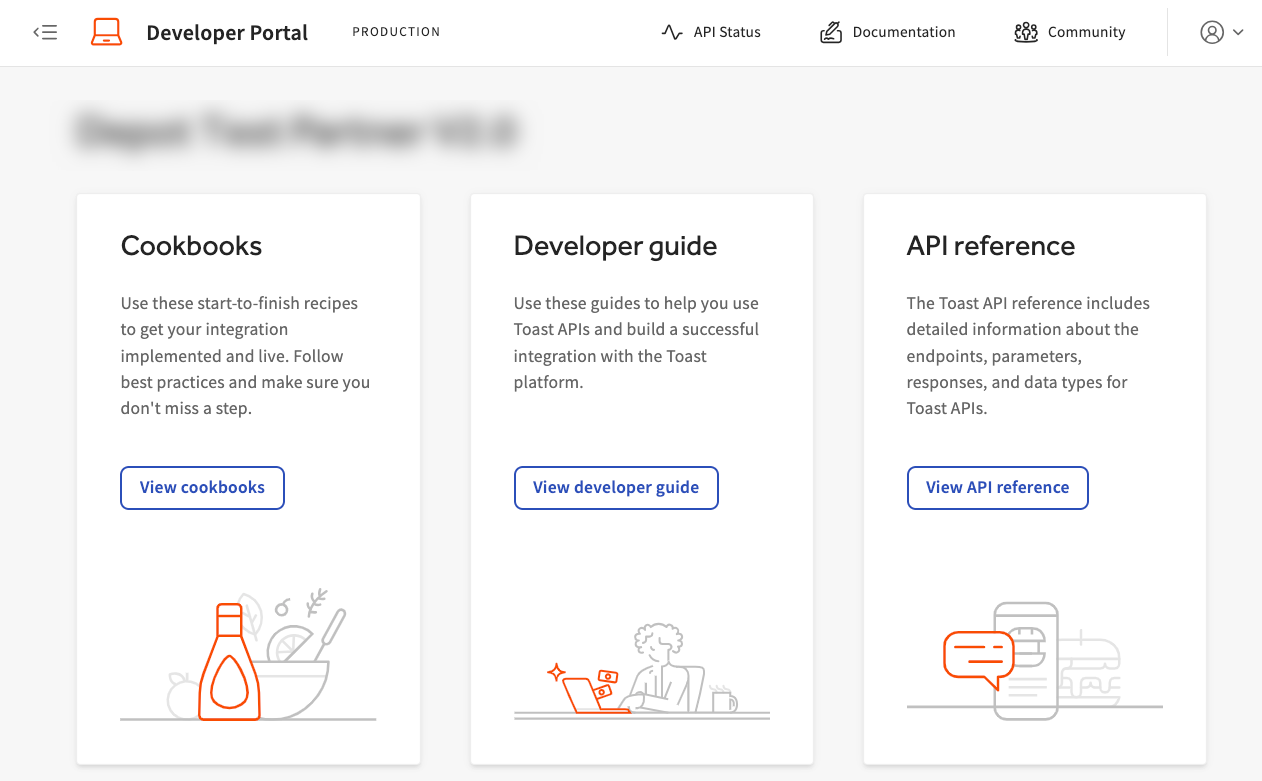
On the developer portal home page, you can:
-
View API operational status
-
View technical documentation
-
View cookbooks
-
View the Developer guide
-
View API references
-
View the Platform guide
-
View API and Platform release notes
-
-
Visit the Toast Integrations Community Forum
-
View and manage your credentials
-
View your connected restaurants
-
View and manage your Toast Partner Integrations marketplace listing
-
View and manage your payment methods
-
View and manage your webhooks
-
Submit feedback and request support
|
Note |
|
To get access to the environment selector, open a support request with the Toast Developer Relations team. For more information, see Getting help with your integration. |
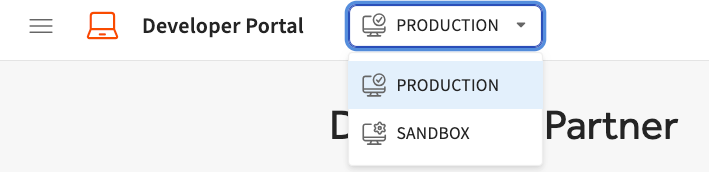
The environment selector allows you to manage environment-specific data. You can switch between sandbox and production environments using the environment selector dropdown menu. You can manage and view environment-specific data on the following pages:
-
Credentials
-
Connected restaurants
-
Marketplace listing
-
Webhooks
The following image shows the environment selector on the Toast developer portal page.
The API status button on the top navigation bar opens the Toast APIs status and incident history page.
The Documentation button on the top navigation bar opens the Technical Documentation site. The site has links to various documentation resources useful for integration developers.
The Community button on the top navigation bar opens the Toast Integrations Community Forum. In the forum, you can read announcements and news, ask questions, and submit feature requests.
The Credentials page contains your API credentials. Your API credentials grant you access to Toast resources and allow you to securely send API requests. For more information about credentials, see Authentication and restaurant access.
The Credentials page contains your Client name, Client ID, and Client secret.
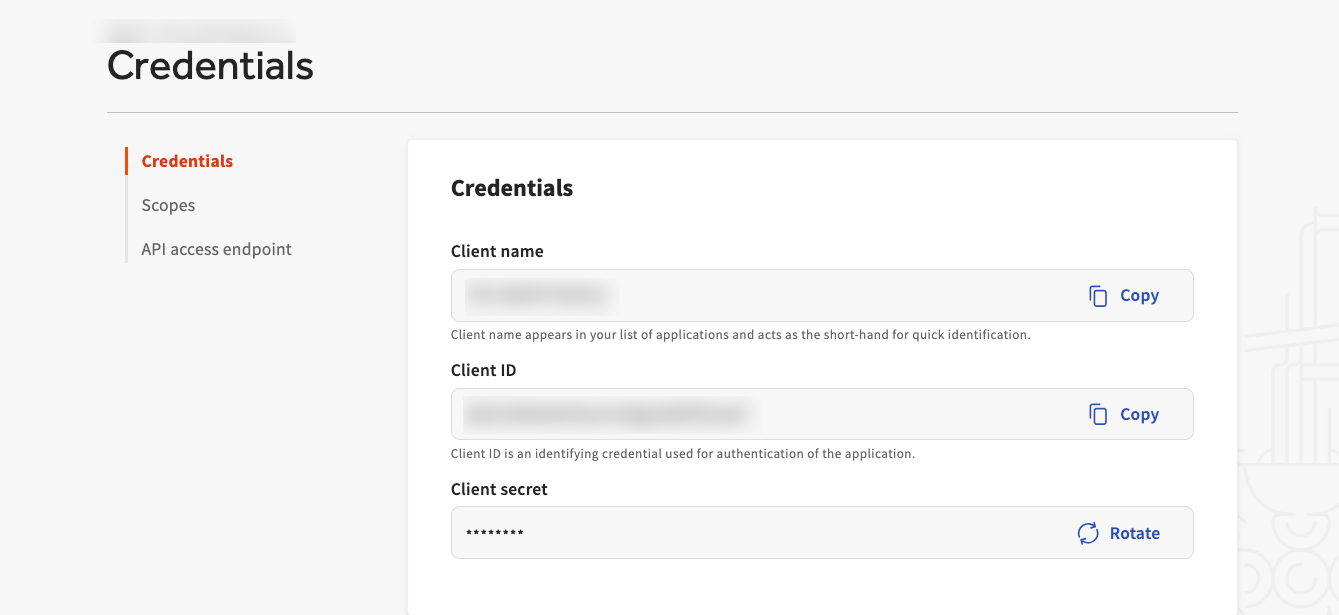
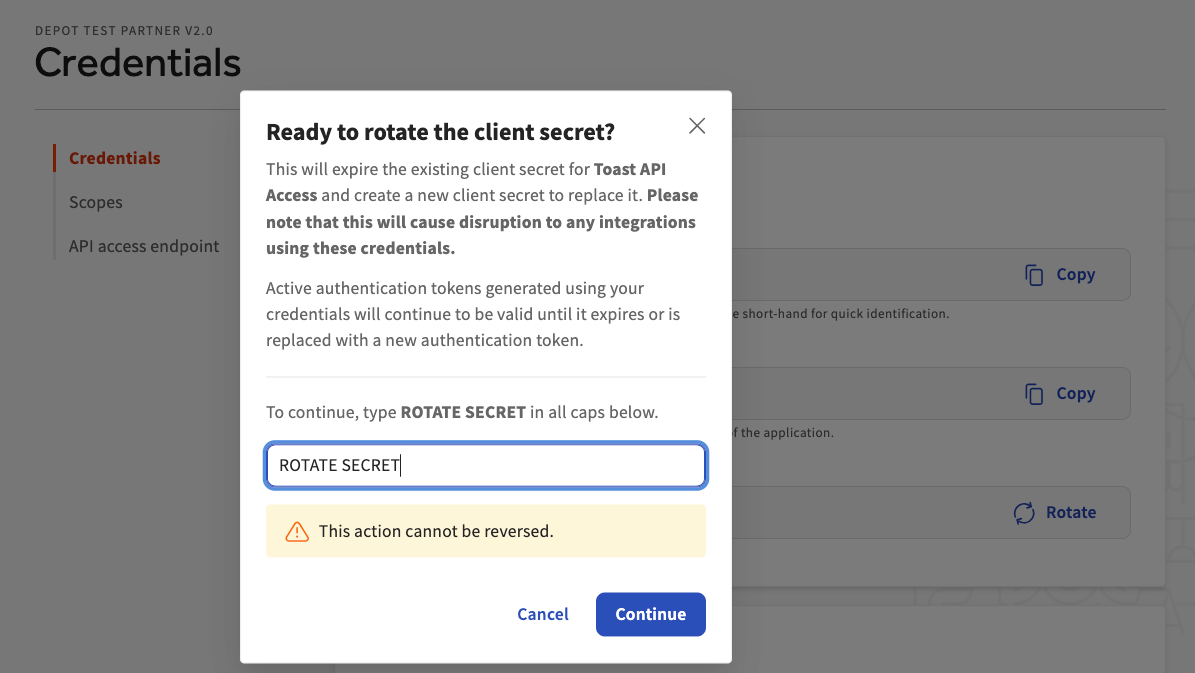
To copy your Client name or Client ID, select the Copy button to copy the information to your clipboard. To rotate your Client secret, select the Rotate button to open the Ready to rotate the client secret dialog. In the Ready to rotate the client secret dialog, confirm you want the existing client secret to expire and want to create a new client secret. To confirm, type ROTATE SECRET in the text field and then select the Continue button.
|
Note |
|
Rotating your client secret terminates the existing client secret for Toast API access and creates a new client secret to replace it. The active authentication token generated using your credentials is valid until it expires or is replaced with a new authentication token. |
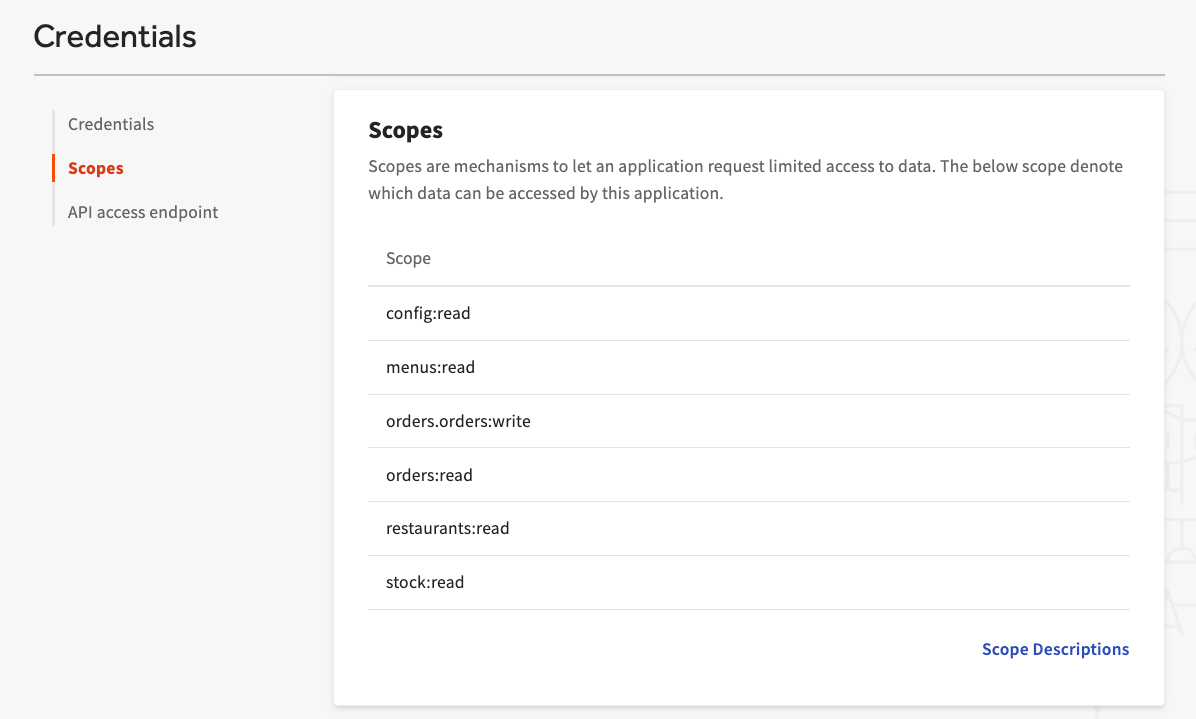
The Scopes page contains the API scopes associated with your developer portal account. Access to Toast APIs, specific endpoints, and specific API endpoint operations is controlled by the scopes that are associated with your client credentials. For more information, select the Scope Descriptions link.
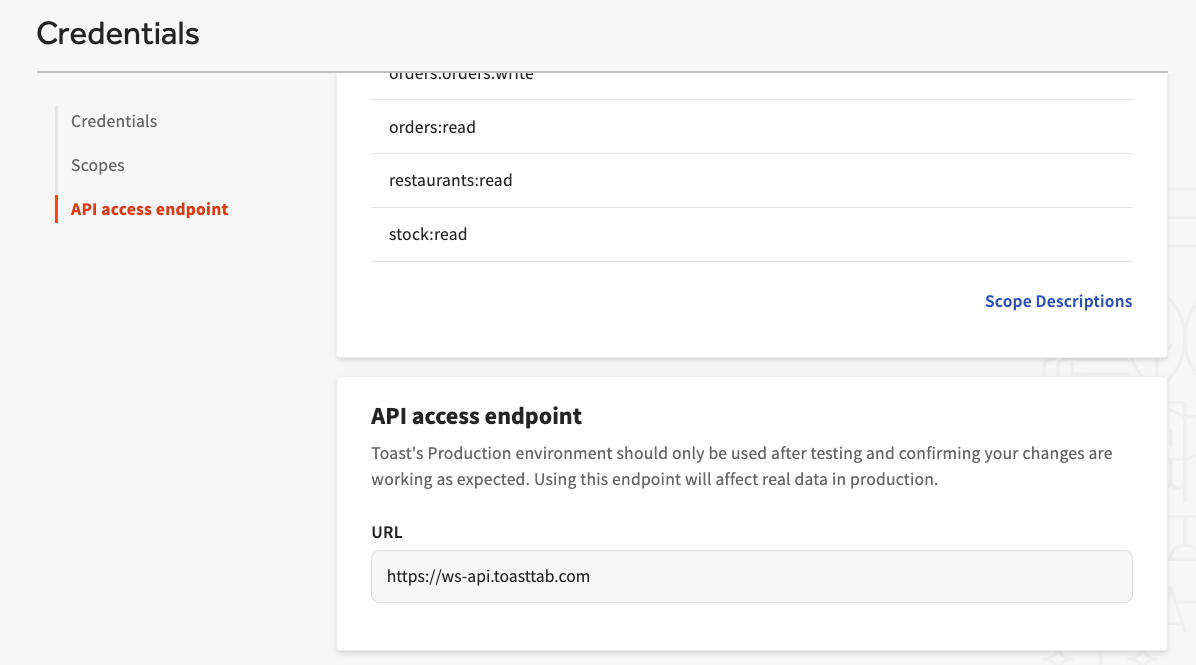
The API access endpoint page displays the endpoint you can use to access Toast's production environment. For more information, see Environments.
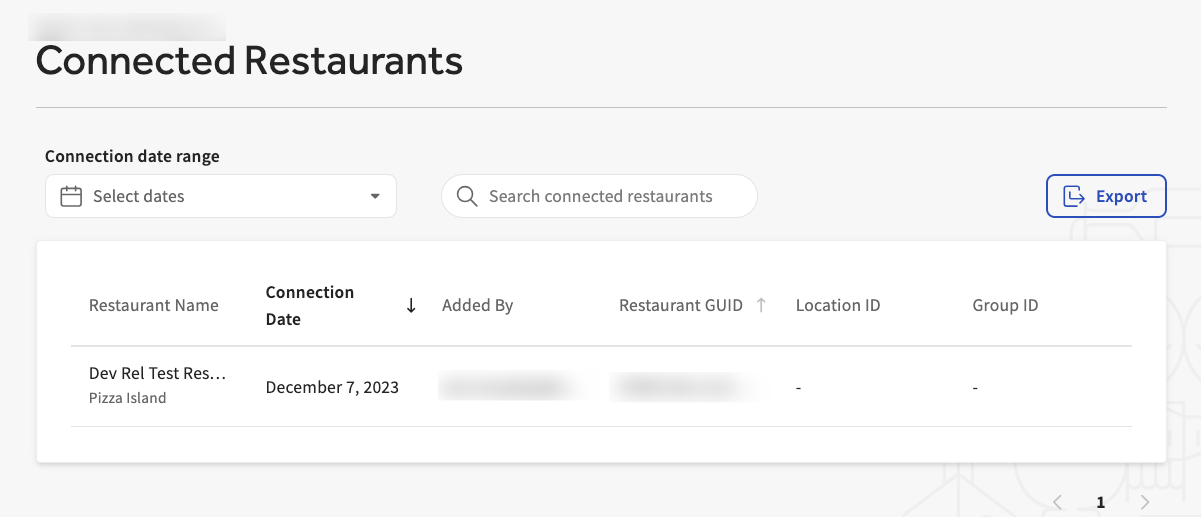
The Connected Restaurants page displays all the restaurants that are connected to your integration.
You can filter your connected restaurants by custom date range. To filter by date range, select the date picker and enter your custom date range. Select the Apply button to apply the custom date range filter. The Connected Restaurants page displays a list of connected restaurants that match your filter.
You can also enter words into the search field to search for connected restaurants. As you type, the developer portal automatically searches and shows a list of connected restaurants that match the entered characters. For example, if you search for "island", your search results may display a restaurant located in Long Island, and another with "island" in the restaurant name.
You can also export a report of your connected restaurants by selecting the Export button. The report contains the same information that is displayed on the Connected Restaurants page.
The Toast Partner Integrations marketplace listing page is where you can manage the details of your Toast Partner Integrations listing. Your marketplace listing provides information about your integration, such as a description, logo, and support details. Toast Partner Integrations is Toast's integration management portal. You can add an integration to a Toast POS location using the My Integrations page in Toast Web.
You can edit your integration’s sandbox or production marketplace listing using the environment selector. Select the environment to edit that environment’s integration marketplace listing details and appearance.
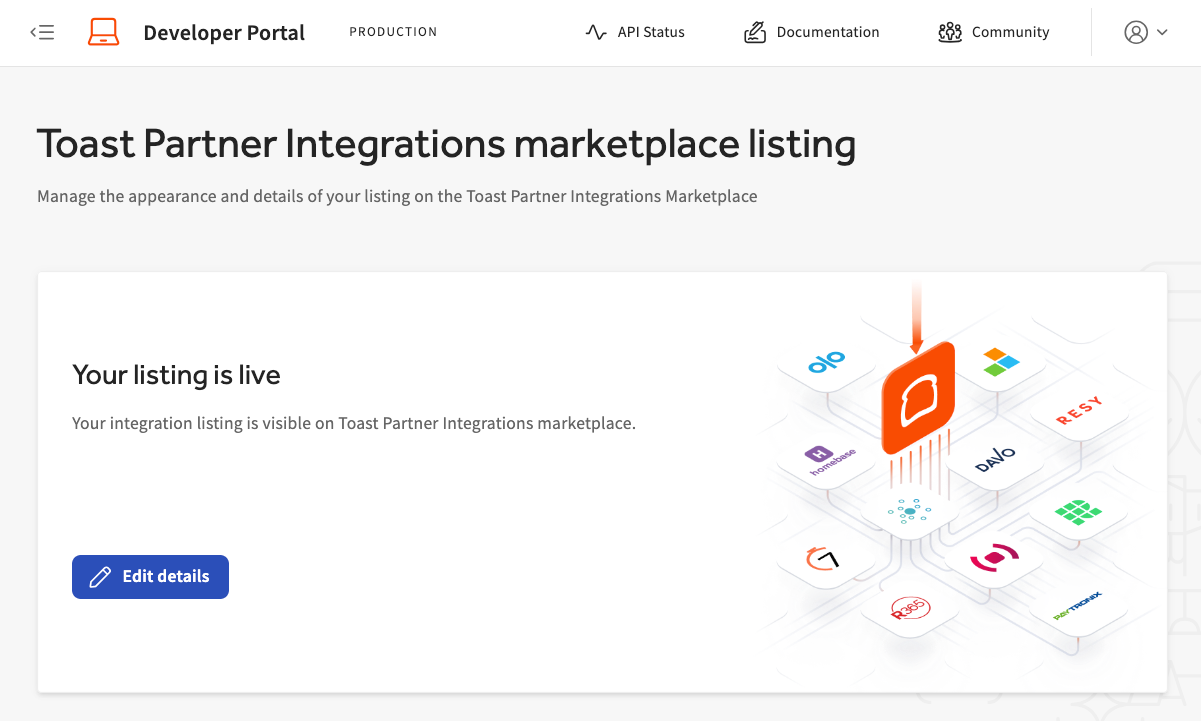
On the Toast Partner Integrations marketplace listing page, you can edit and view your integration listing using the progress bar to guide you through the setup process. You can edit how your integration’s listing appears on Toast Partner Integrations by selecting the Edit details button.
To edit your integration listing
|
Note |
|
You can proceed forward through the setup process by selecting the Continue button or go back to the previous section by selecting the Back button. |
-
On the Toast Partner Integrations marketplace listing page, select the Edit details button. This opens the About your app section. This is the first section of the integration setup process. Each section of the setup process is listed below:
-
About your app:
-
Onboarding email address: This is the email address that Toast uses to send integration communication requests to.
-
Categories: This field is automatically populated and cannot be edited. The categories listed correspond to categories listed on the Add Integrations page in Toast Web. To edit categories, select the open a ticket link to open a support request with the Toast Developer Relations team.
-
Available in: This field is automatically populated and cannot be edited. To edit your integration’s country availability, select the open a ticket link to open a support request with the Toast Developer Relations team.
-
-
Support:
-
Support phone number: This is the phone number that directs Toast customers to contact if they need help with your integration.
-
Company website URL: This is the website URL of your integration’s website.
-
Support email address: This is email address that directs Toast customers to contact if they need help with your integration.
-
-
Marketplace listing:
Note
A preview of your Toast Partner Integrations listing appears to the right of the Marketplace listing section. The preview displays your logo, short description, and categories. Buttons and links are disabled in the preview. Your integration's description and image are visible to all Toast customers who subscribe to Toast Partner Integrations.
-
Application logo: Delete your application image, or upload or drag and drop a new image that will appear on your integration’s Toast Partner Integrations listing.
-
Short description: Enter a short description for your integration. The description is visible to all Toast customers who have access to Toast Partner Integrations. The description cannot exceed 120 characters.
-
Primary action label: This field is automatically populated and cannot be edited. The primary action label appears on the action button on your integration's marketplace listing. To edit your primary action label, select the open a ticket link to open a support request with the Toast Developer Relations team.
-
Primary action reference: This field is automatically populated and cannot be edited. The primary action reference directs customers to an external link to either learn more about the integration, request a demo, or complete an action. To edit your primary action reference, select the open a ticket link to open a support request with the Toast Developer Relations team.
Note
You can also set optional secondary action labels and references that will appear on your Toast Partner Integrations listing. To edit your secondary action label or action reference, select the Open a support ticket link to open a support request with the Toast Developer Relations team.
-
-
-
Select the Submit button to save your changes or the Back button to go back to the previous section.
You can use the links to the right of the About your app section to learn more about integrations or to open a support request. Select the links to:
-
Learn more about what happens when a restaurant adds your integration in Toast Partner Integrations.
-
Learn more about the Partners webhook and how to use it to be notified when a restaurant adds your integration.
-
Visit the Toast Integrations Community Forum and open a support request with the Toast Developer Relations team.
|
Important |
|
This feature is in limited release. |
The Payment methods page displays your payment method configurations and their statuses. On the Payment methods page, you can also choose to add a payment method configuration or edit an existing configuration.

Use the procedure below to add a new payment method configuration.
To add a new payment method configuration
-
On the Payment methods page, select the + Add a configuration button. This opens the Add configuration dialog.
-
In the Add configuration dialog, enter a name for the new configuration and toggle on or off the following payment methods: Apple Pay, Google Pay, and Keyed-in cards.
-
Select the Save button or select the Cancel button to close out of the dialog.

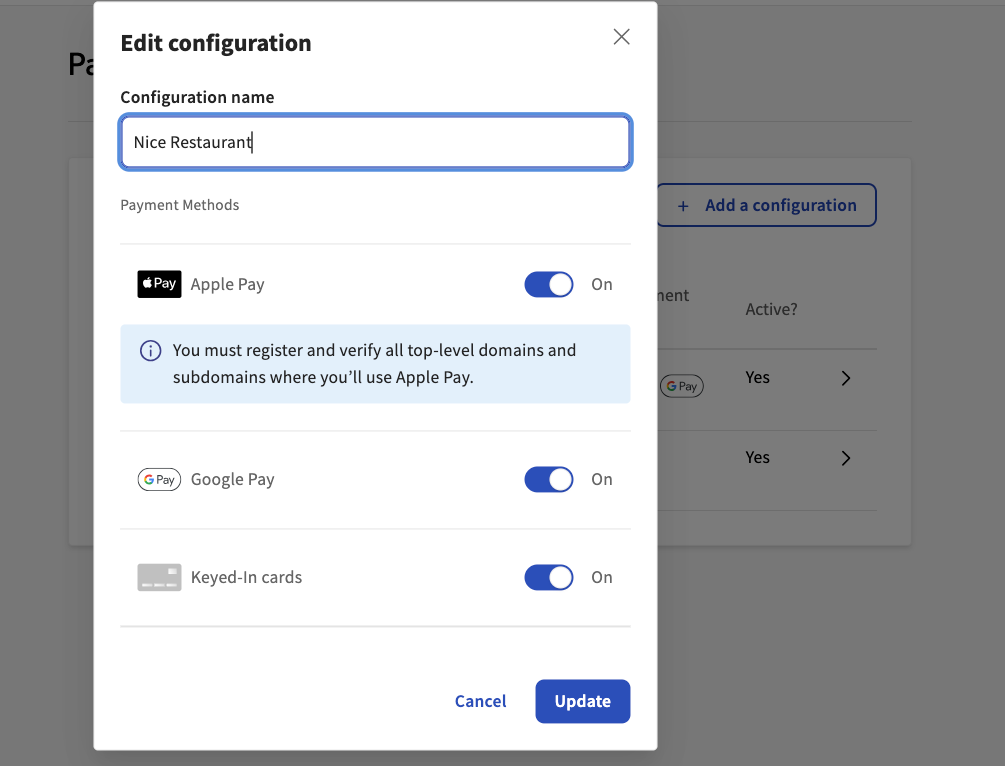
On the Payment methods page, you can edit an existing payment method configuration. Select the arrow next to the payment method configuration to open the Edit configuration dialog. In the dialog, you can:
-
Edit the configuration name
-
Toggle payment methods on or off
Select the Update button to save your changes or select the Cancel button to close out of the dialog.
The Webhooks page displays all your webhook subscriptions and their statuses, webhook subscription GUIDs, webhook event categories, and additional information. For more information about webhooks, see Webhooks reference.
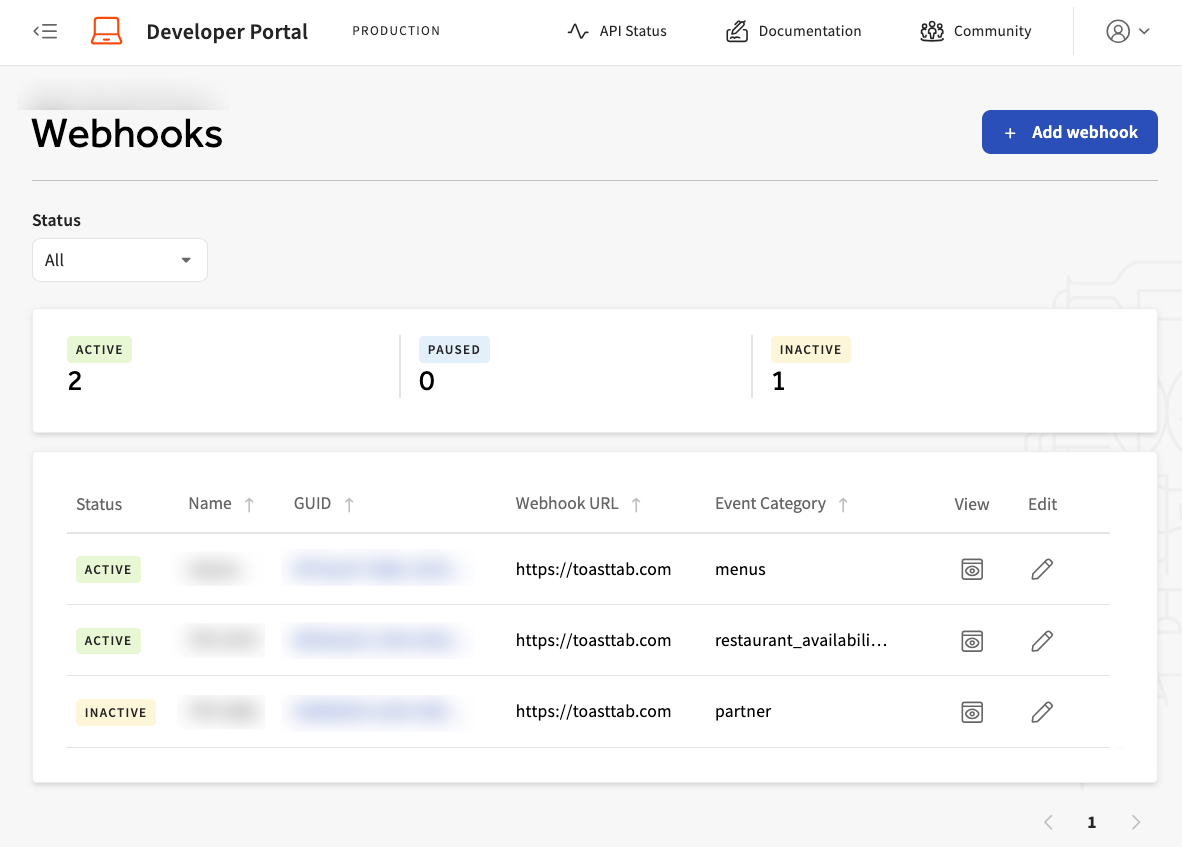
On the Webhooks page, you add a new webhook subscription or view and edit details of a webhook subscription.
Use the procedure below to add a new webhook subscription.
To add a new webhook subscription
-
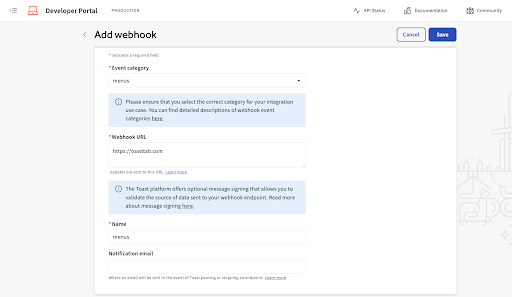
On the Webhooks page, select the + Add webhook button to open the Add webhook page.
-
On the Add webhook page, complete the following fields:
-
Event category: Select your event category from the drop-down menu. For more information, see Webhooks reference.
-
Webhook URL: Enter the URL of the webhook consumer service that receives the webhook events.
-
Webhook name: The name is automatically populated after you select the Event category.
-
Notification email: The email address that messages and notifications are sent to if Toast experiences an outage, breakage, or delays with webhook endpoints.
-
-
Select the Save button to save your changes or the Cancel button to close out of the page.
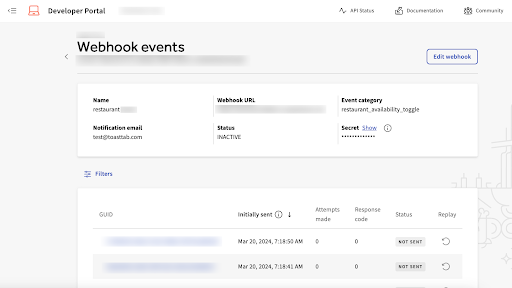
On the Webhooks page, you can view details about your webhook subscription. To view details, select the webhook link or the View button. This opens the Webhooks events page where you can view the follow details:
-
Webhook name
-
Notification email address
-
Webhook URL
-
Webhook status
-
Event category
-
Secret key. For more information, see Message signing.
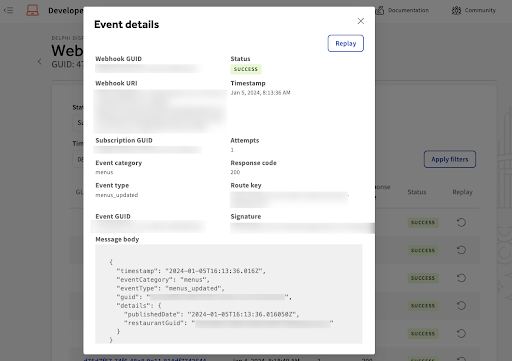
To view additional details about a webhook event, select the webhook GUID link. This opens the Event details dialog. In the Event details dialog, you can view the following information:
-
Webhook GUID: The identifier of the webhook. The GUID is unique per event subscription.
-
Webhook URL: The URL of the webhook consumer service that receives the webhook events.
-
Subscription GUID: This identifies the partner and the event category.
-
Event category: The classification for the type of events the webhook sends.
-
Event type: The name of the specific type of webhook event.
-
Event GUID: The identifier of the webhook event. The GUID is unique per webhook event.
-
Webhook event status.
-
Date and time of the webhook event.
-
Number of webhook attempts.
-
Response code.
-
Route key.
-
Signature. For more information, see Message signing.
-
Webhook request body.
Use the procedure below to filter events associated with your webhook subscription.
To filter webhook events
-
On the Webhooks events page, select the Filters button to open the Filters pane. You can filter by the following options:
-
Webhook event status:
-
All
-
Success
-
Pending
-
Not sent
-
Failure
-
-
Date range
-
Time period
-
-
Select the Apply filters button to apply the filters. This displays a list of webhook event results. Each webhook event result displays the following information and available actions:
-
Webhook GUID. This is the identifier of the webhook. The GUID is unique per event subscription.
-
Date and time the webhook event was initially sent to the webhook URL.
-
Number of webhook attempts. For more information about retry attempts, see Retry support.
-
Webhook response code.
-
Webhook event status.
-
Replay button. This requests the webhook message be resent.
-
|
Note |
|
You can edit webhook details on the Edit webhook page. You can navigate to the Edit webhook page by selecting the Edit button next to the webhook link on Webhooks page or by selecting the Edit webhook button on the Webhook events page. |
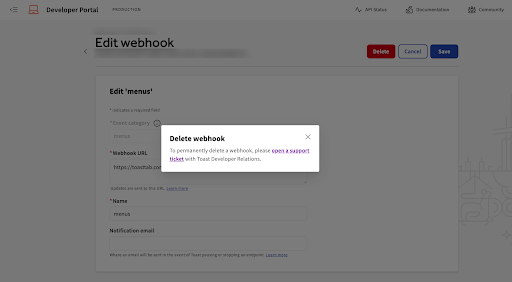
Use the procedure below to edit details about your webook subscription or delete your subscription.
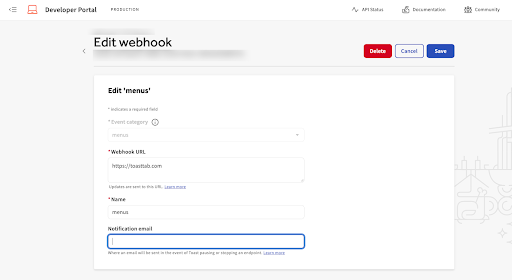
To edit webhook details
-
Navigate to the Edit webhook page from the Webhooks page or from the Webhooks events page.
-
On the Edit webhook page, you can edit the following fields:
-
Webhook URL
-
Webhook name
-
Notification email address
Note
The event category cannot be edited.
-
-
Select the Save button to save your changes, the Cancel button to close out of the page, or the Delete button to be directed to open a support request with the Toast Developer Relations team.
|
Note |
|
The Activity Log page does not track user actions taken in Toast Web. |
The Activity Log page displays a list of the instances when the client secret was rotated. You can rotate the client secret on the Credentials page.
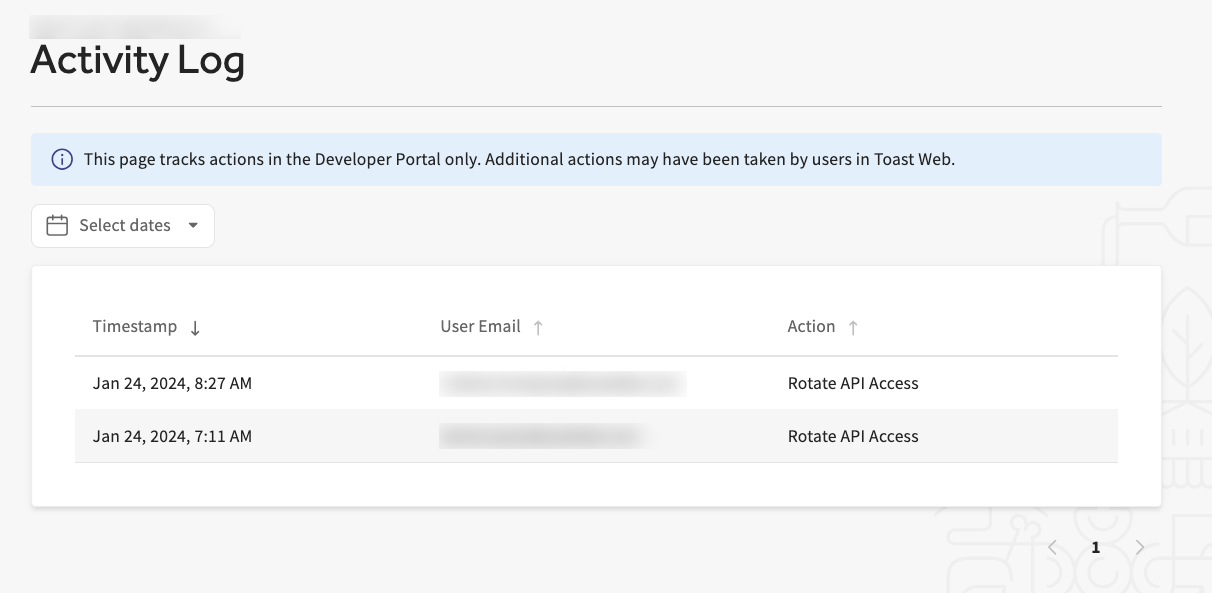
You can filter your activity log by custom date range. To filter by date range, select the date picker and enter your custom date range. Select the Apply button to apply the custom date range filter. The Activity Log displays a list of activities that match your filter, or displays a message notifying you that no activities match your filter.
You can find help and provide feedback on the Toast developer portal by selecting the Support or Feedback tabs on the left navigation pane. The tabs open the Toast Integrations Community Forum where you can view support articles or submit a request.
You can view the Developer guide by selecting the User guide tab on the left navigation pane. The tab opens to the Toast developer portal overview.