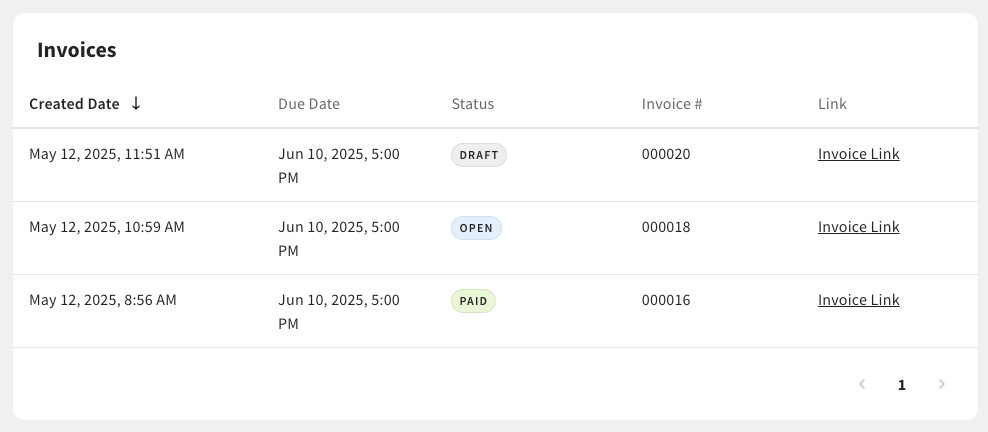
House account invoices have one of the following statuses:
-
PAID: The invoice has been paid.
-
OPEN: The invoice has been created and sent.
-
DRAFT: The invoice has been created but not sent.
Invoices can be sent according to a set payment schedule. At the end of the billing cycle, you must create and send an invoice(s) for the outstanding house account balance.
You can create an invoice(s) for house account(s) in Toast Web.
To create a house account invoice
-
Choose Payments > Payment methods > House accounts to open the Accounts page.
-
Select the house account to invoice. This opens the House account profile page.
-
On the House account profile page, select the Create Invoice button. This opens the New invoice page.
-
On the New invoice page, you can view and access the following tabs:
-
Customer
-
Order
-
Payment schedule
-
Details
-
History
-
-
On the New invoice page, you can customize your invoice:
-
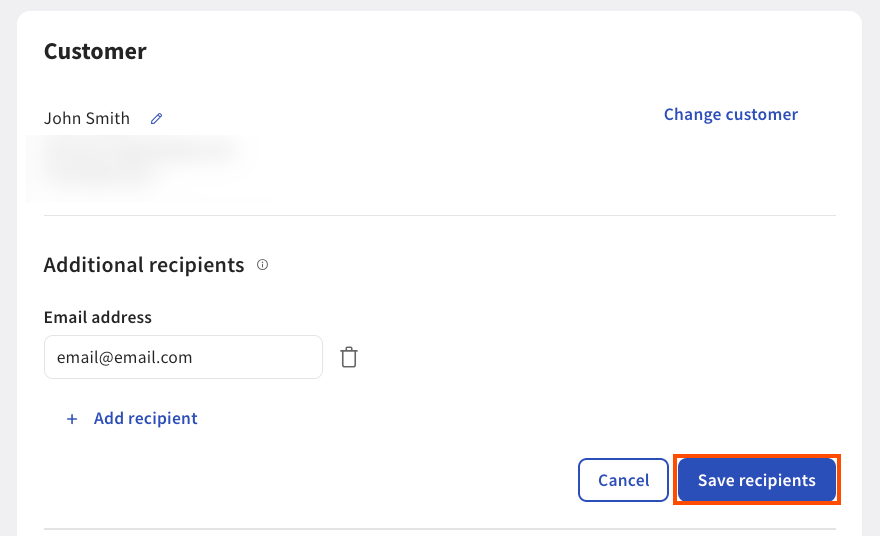
From the Customer tab:
-
Edit your guest information:
-
Select the + Add additional recipients link to manually add another email address to send the invoice to. Under Email address, enter the email address and then select the Save recipients button to save your changes. You can add multiple email addresses.
-
-
Choose whether to send the invoice by email or text message or both.
Note
If you choose to send invoice by text message, a dialog appears with SMS Terms and Conditions. Select the Close button to acknowledge the Terms and Conditions.
-
-
From the Order tab:
-
Open a new order. This converts a draft order into an open order and sends it to all Toast POS devices.
-
Select the house account dining option to invoice. This sorts and filters all in-store orders linked to the house account dining option.
-
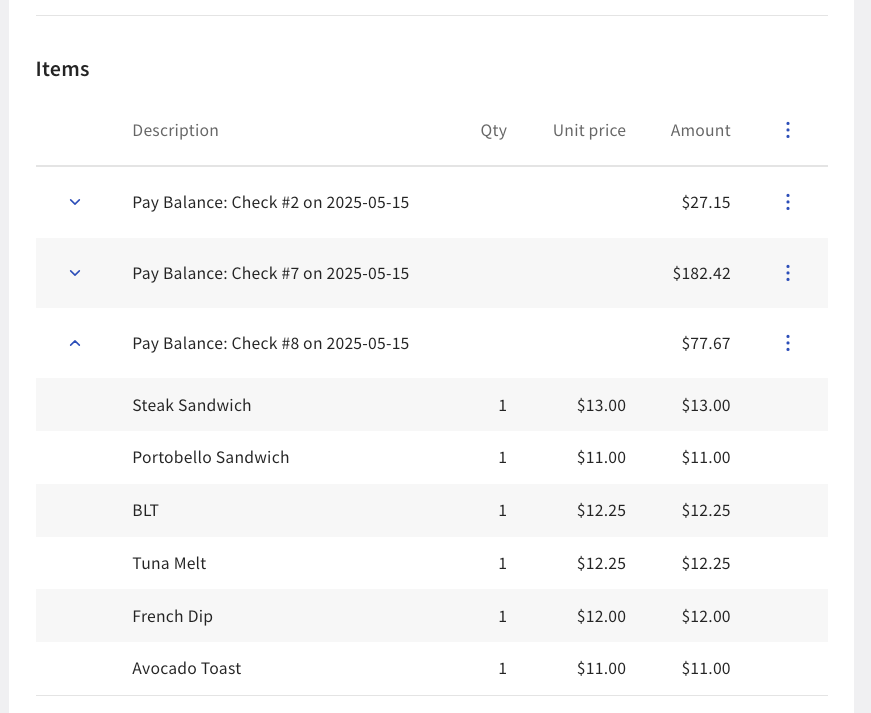
View, add, or delete items in the invoice or adjust your invoice balance:
-
To view the items in your invoice, select the down arrow next to the check number. This displays all the items in your check.
-
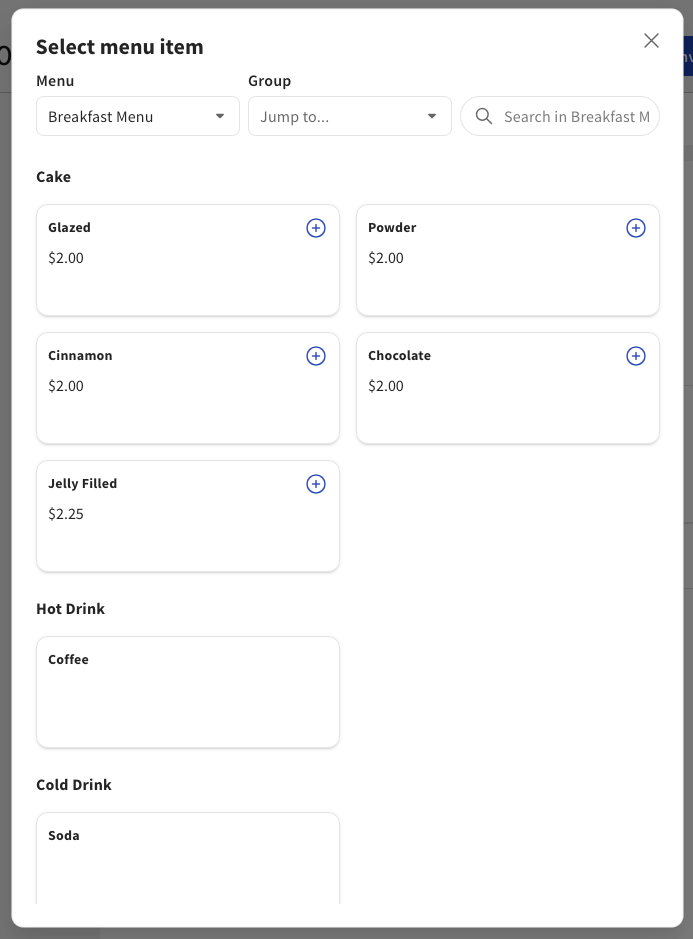
To add an item to your invoice, select the Add item link. This opens the Select menu item page. On the Select menu item page, you can search for a menu item and then select the Add to order button to add it to the order.
-
To delete an item from your invoice, select the Delete button in the overflow menu. This deletes the item from the invoice.
-
To edit your invoice balance, select the Edit button in the overflow menu. This opens the Add House Account balance to invoice dialog. In the Add House Account balance to invoice dialog, you can change your charge method, invoice amount, and item name.
-
-
Mark order as tax exempt: Select the checkbox to exclude taxes from the invoice. If you choose to make the order tax-exempt, you cannot add a discount.
-
Add tax exemption ID: Add a tax exemption ID. For more information, see this Toast Central article.
-
-
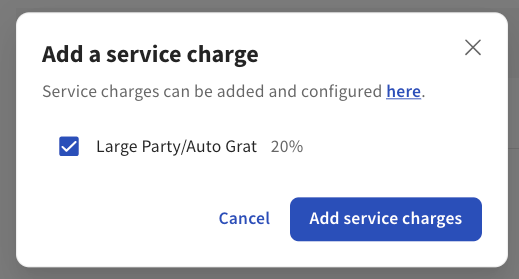
Add a service charge to the invoice. To add a service charge, select the + Add service charge link to open the Add a service charge dialog. In the Add a service charge dialog, select the service charge and then the Add service charges button to add the charge to the invoice. For more information, see Configuring service charges.
-
Add a discount to the invoice. To add a discount, select the + Add discount link to open the Add discount dialog. In the Add discount dialog, select the discount type and then the Add discount button to add the discount to the invoice.
-
-
From the Payment schedule tab:
-
Configure how and when you want your guests to pay their invoices:
-
Choose the due date for the invoice. Use the date picker to set the payment deadline. If the invoice is paid after the due date, it is considered past due.
-
Choose to either pay the full amount or a percentage of the invoice amount.
-
-
-
From the Details tab:
-
(Optional) Choose an employee from the Server dropdown menu that will receive tips from the order.
-
Select if you want to Allow customers to add a tip and to Allow customers to pay with a credit card.
-
Allow customers to add a tip: This allows your guests to add a tip to the invoice.
-
Allow customers to pay with a credit card: This allows your guests to pay their invoice with a payment card.
-
-
Choose to enter a custom message to attach to the invoice.
-
Choose to add an attachment to the invoice email.
-
-
From the History tab:
-
View house account’s payment history.
-
-
-
Select the Review invoice button to open the Review and send invoice page or select the Save as draft link to save the invoice.
-
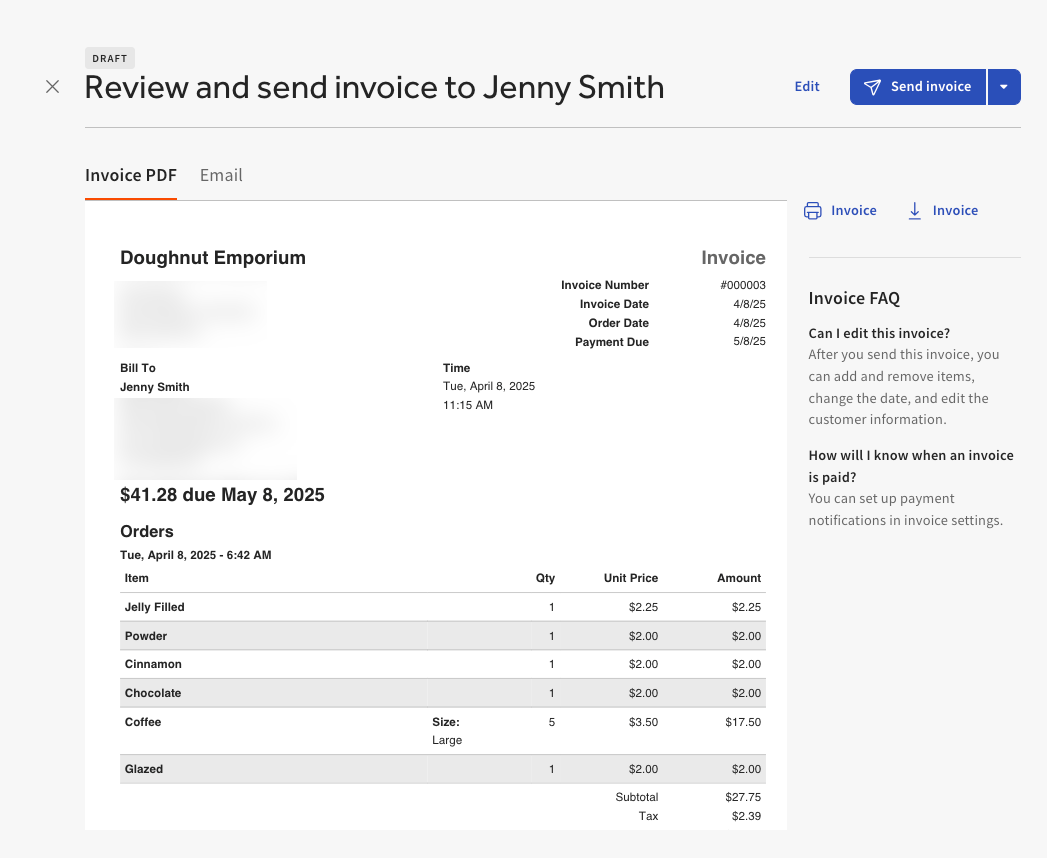
On the Review and send invoice page, you can complete the following actions:
-
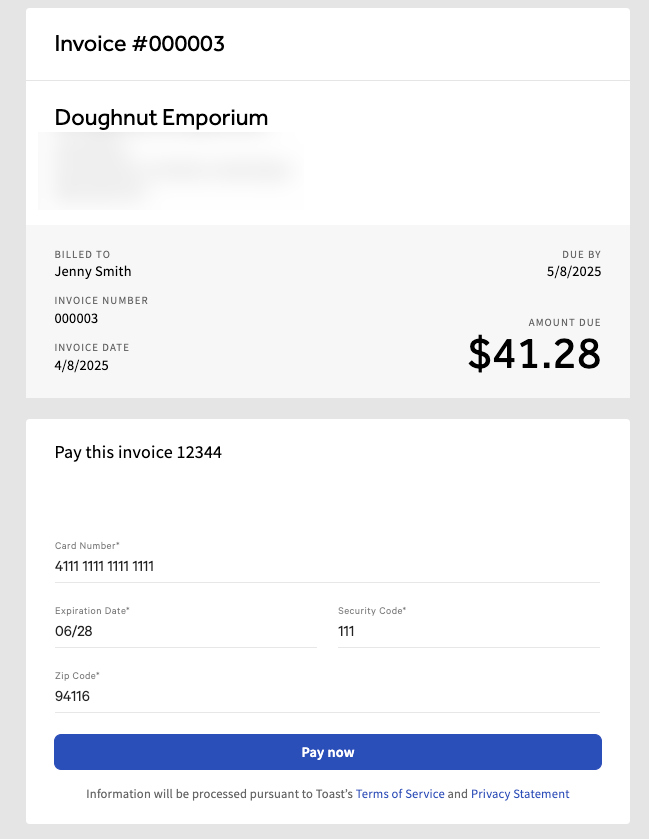
View a PDF of the invoice
-
View an email version of the invoice
-
Edit the invoice
-
Send the invoice
-
Print the invoice
-
Download the invoice
-
-
Select the Send invoice button to send the invoice by email or select the down arrow to the right of the Send invoice button to also choose to send by text message. On the House account profile page, the recently created invoice shows a status of OPEN.
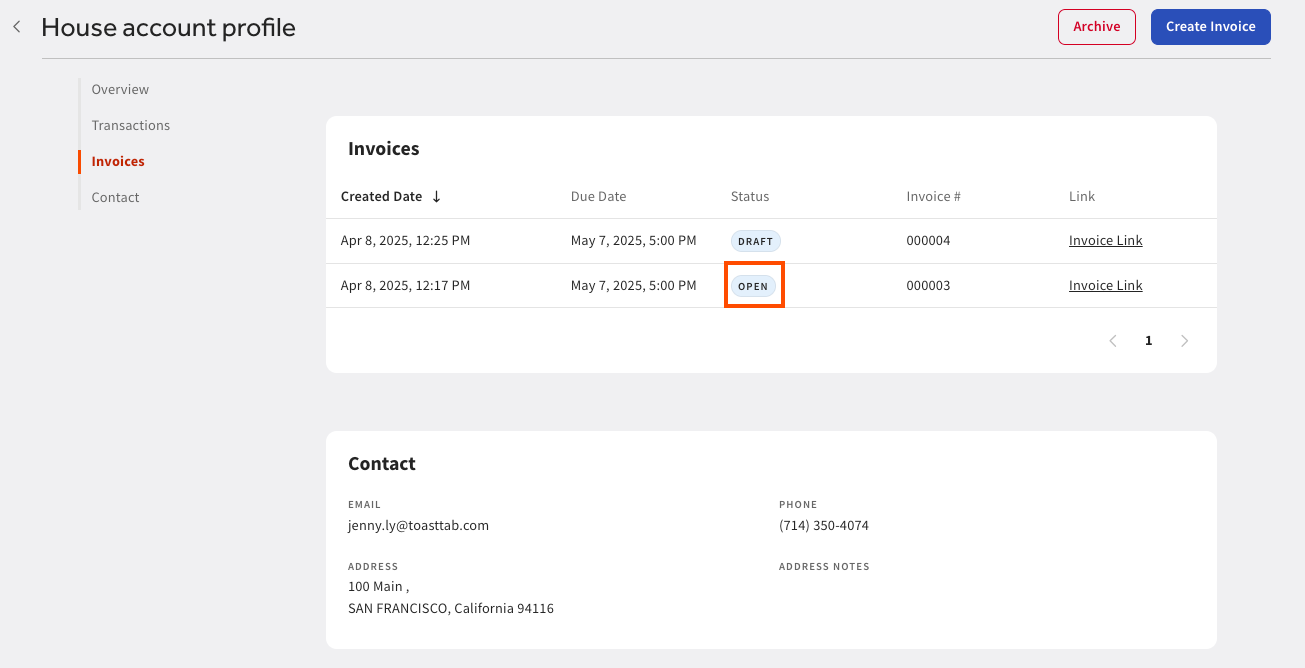
The newly created invoice is sent as an email, text message, or both to your guest with a link to view and pay their invoice.
You can send a previously saved draft invoice from the House account profile page. You can edit draft invoices before you send them.
In the Invoices section, choose the invoice with a DRAFT status and select the Invoice Link to open the Invoice page. Complete the workflow from the Creating a house account invoice section.
On the Invoice page, you can delete a draft invoice. From the Actions dropdown menu, select Delete draft. A confirmation dialog box appears asking if you want to delete the draft. This action cannot be undone. Select the Delete draft button to continue. This opens the Catering & Events page where you view all your invoices and their statuses. The invoice is removed from the Invoice page.
You can choose to create multiple invoices and bulk send them to guests to collect payment. You can bulk create and send invoices on the House accounts page in Toast Web.
To create bulk invoices
-
Navigate to Payments > Payment methods > House accounts to open the House accounts page.
-
On the left panel, select the Bulk Invoice tab. This opens the Bulk invoice page.
-
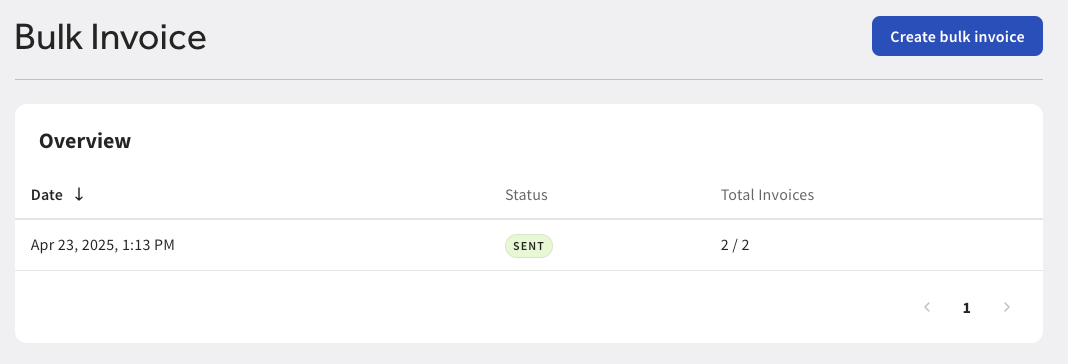
On the Bulk Invoice page, you can view the Oveview table. The Overview table displays the following information:
-
Date the invoice(s) were created
-
The status of the invoice(s)
-
The number of invoices
Select the Create bulk invoice button. This opens the Set up invoices page.
-
-
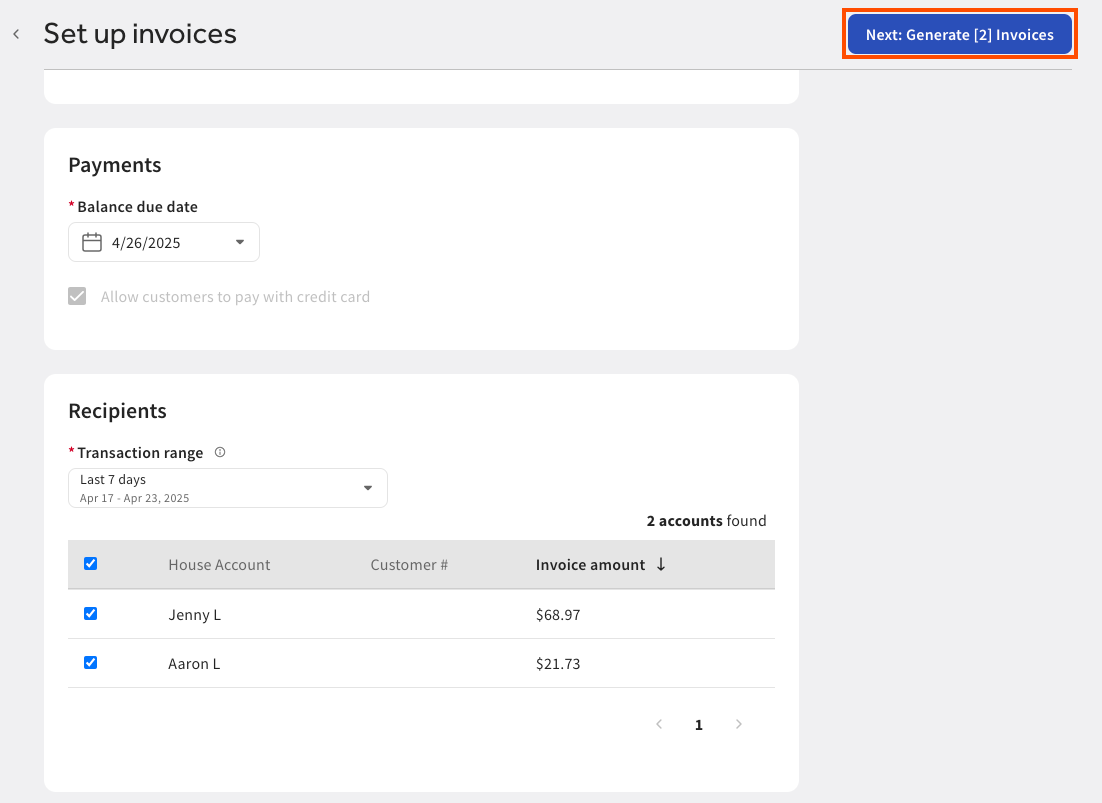
On the Set up invoices page, you can:
-
Select a dining option to create invoices for.
-
Enter a custom message to be sent with the invoices.
-
Select the invoice payment due date.
-
Choose to allow customers to pay with a credit card.
-
Choose to set the invoice amount to the outstanding balance.
-
-
Select the transaction date range. This searches and filters orders by transaction date.
-
-
Select the Generate [number of invoices] invoices button. This navigates you back to the Bulk Invoice page.
-
On the Bulk invoice page, the newly created invoice appears in the Overview table. The Overview table displays the following information:
-
Date the invoice(s) were created
-
The status of the invoice(s). The following statuses are available:
-
CREATING
-
READY TO SEND
-
SENDING
-
SENT
-
CREATED
-
-
The number of invoices
-
-
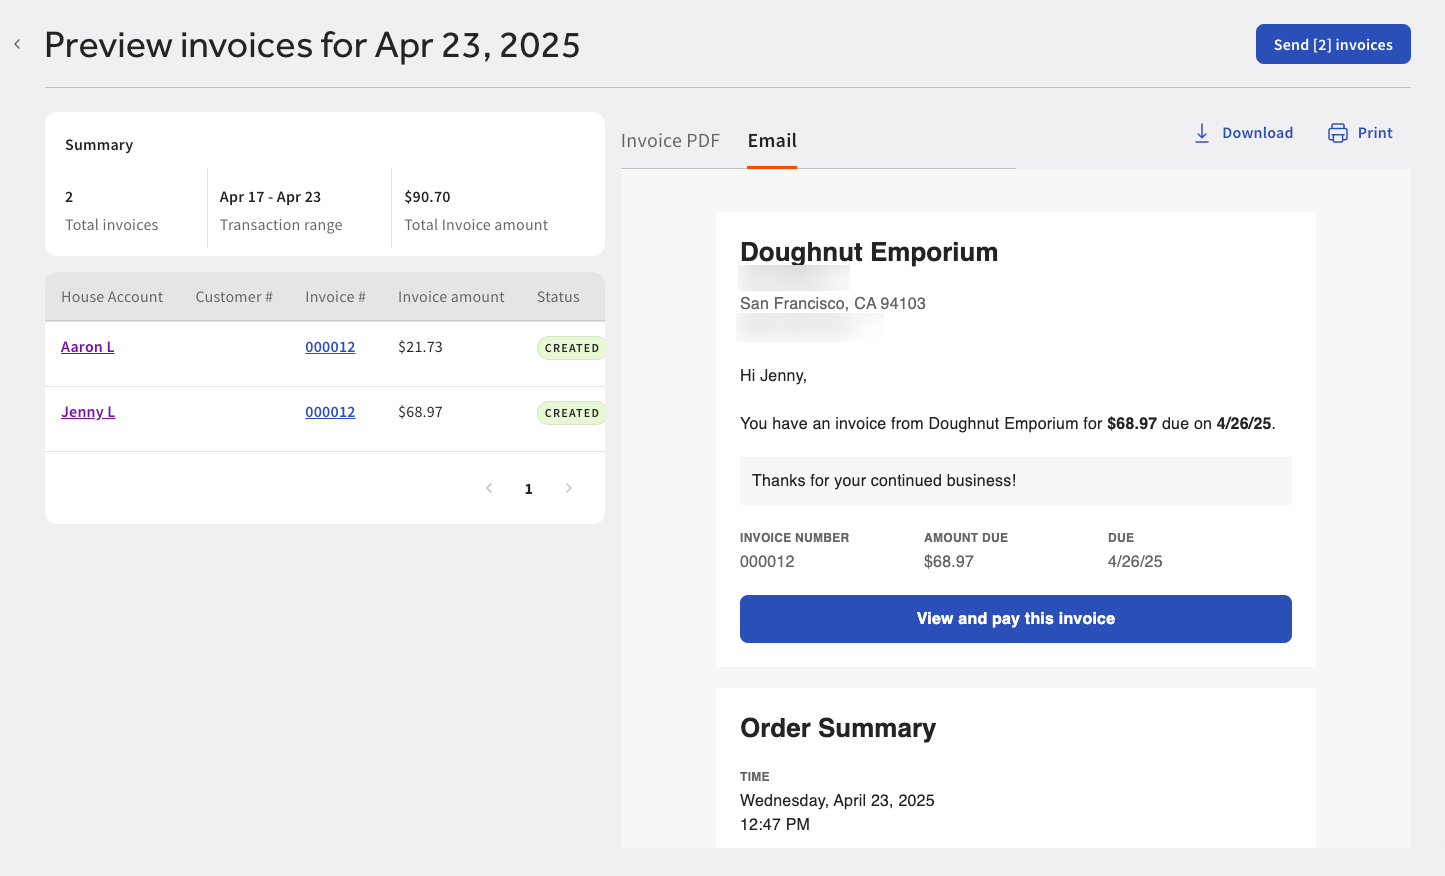
To review the invoices, select the invoice to open the Preview invoices [date] page. On the Preview invoices [date] page, you can view the following information:
-
Summary of the invoices:
-
Total number of invoices
-
Transaction range
-
Total paid and outstanding invoice amount
-
-
House account information:
-
Name of the house account owner
-
Customer number
-
Invoice number
-
Invoice amount
-
Invoice status
-
Link to download the invoice
-
-
A preview of the invoice
-
A preview of the guest email
-
Link to download the invoice
-
Link to print the invoice
-
-
To bulk send the invoices, select the Send [number of invoices] invoices button. A confirmation dialog appears asking if you want to send the invoice. Select the Send invoices button to send the invoices. This navigates you back to the Bulk Invoice page. The status of the invoice changes from READY TO SEND to SENDING.

If the invoice was successfully sent, the invoice status changes to SENT and the number of total invoices changes to reflect the number of successfully sent invoices.