After the orientation of the bump bar is chosen and placement of the bump bar in the kitchen is finalized, you can connect the bump bar to the KDS device. This process is different depending on whether you use a bump bar with a USB cable or a wireless bump bar. For information about how to set up a bump bar with a USB cable, see Setting up a bump bar with a USB cable. For information about how to set up a wireless bump bar, see Setting up a wireless bump bar.
Depending on your KDS device model, you need either a USB-B to USB-C cable or a USB-B to USB-A cable. The bump bar uses a USB-B connector. Toast Flex devices use a USB-C connector. Elo devices use a USB-A or USB-C connector.
|
Note |
|
You need to use the touchscreen functionality of the KDS device to complete the bump bar set up. |
To set up the bump bar with a USB cable
-
Orient the bump bar to your choosing:
-
A horizontal orientation has the USB cable coming from the right side of the bump bar.
-
A vertical orientation has the USB cable coming from the top of the bump bar.
-
-
If needed, remove the overlay insert and replace it with the layout matching your chosen orientation facing outward.
-
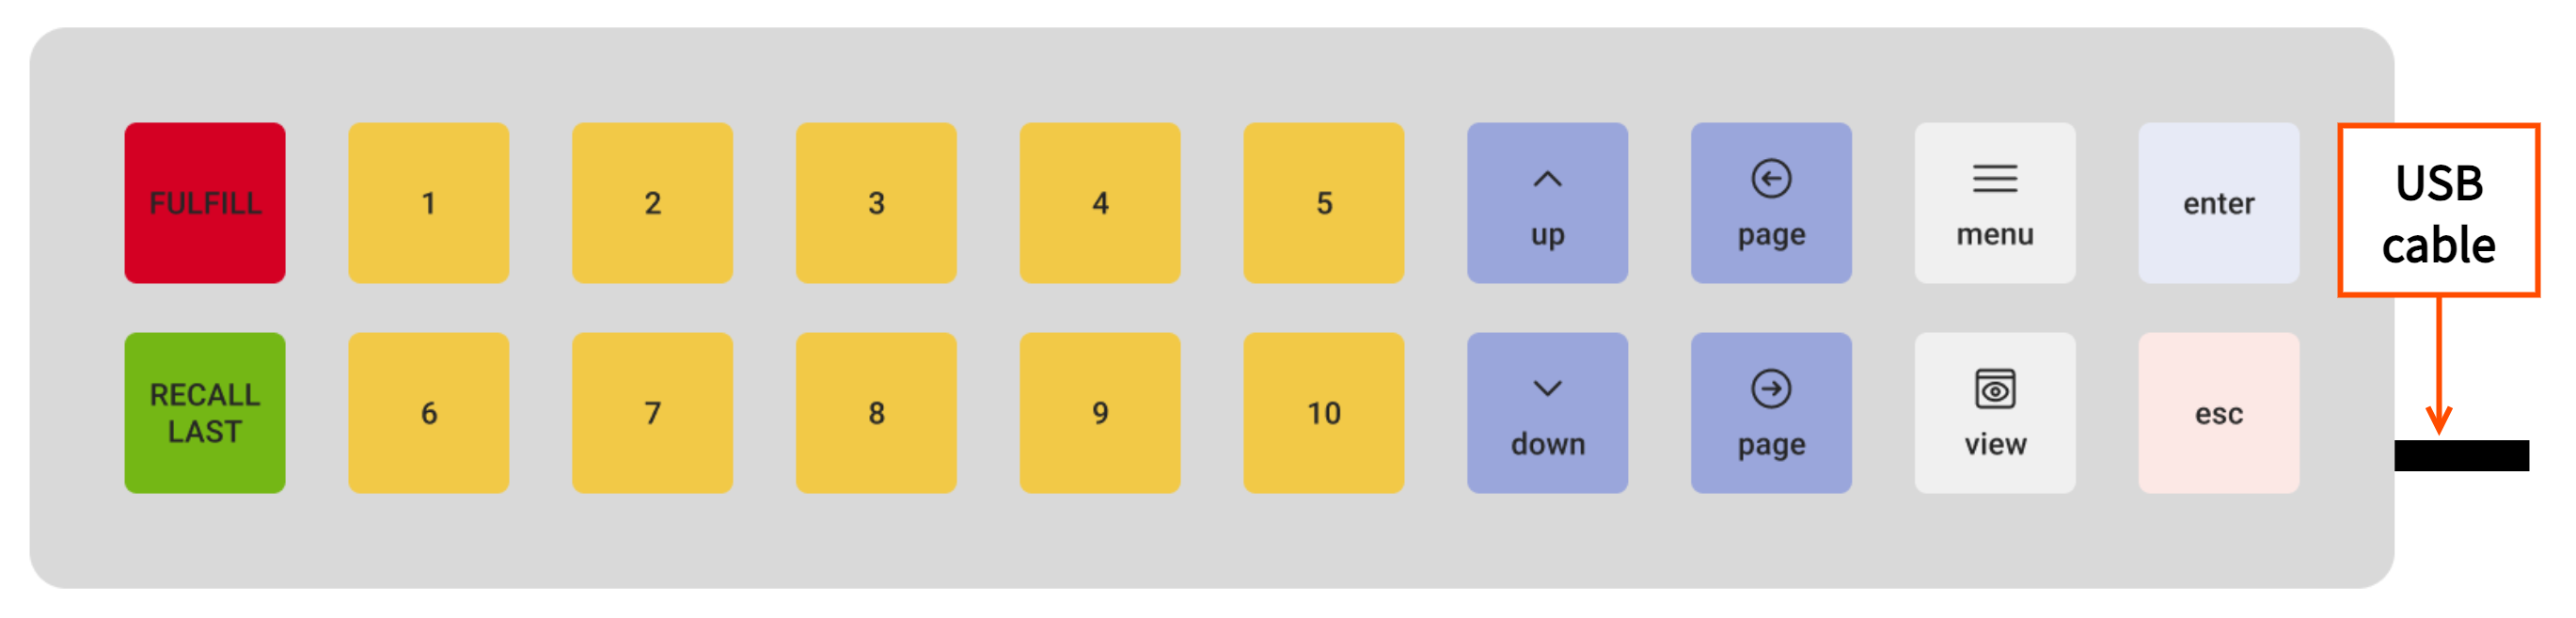
The horizontal bump bar button layout:
-
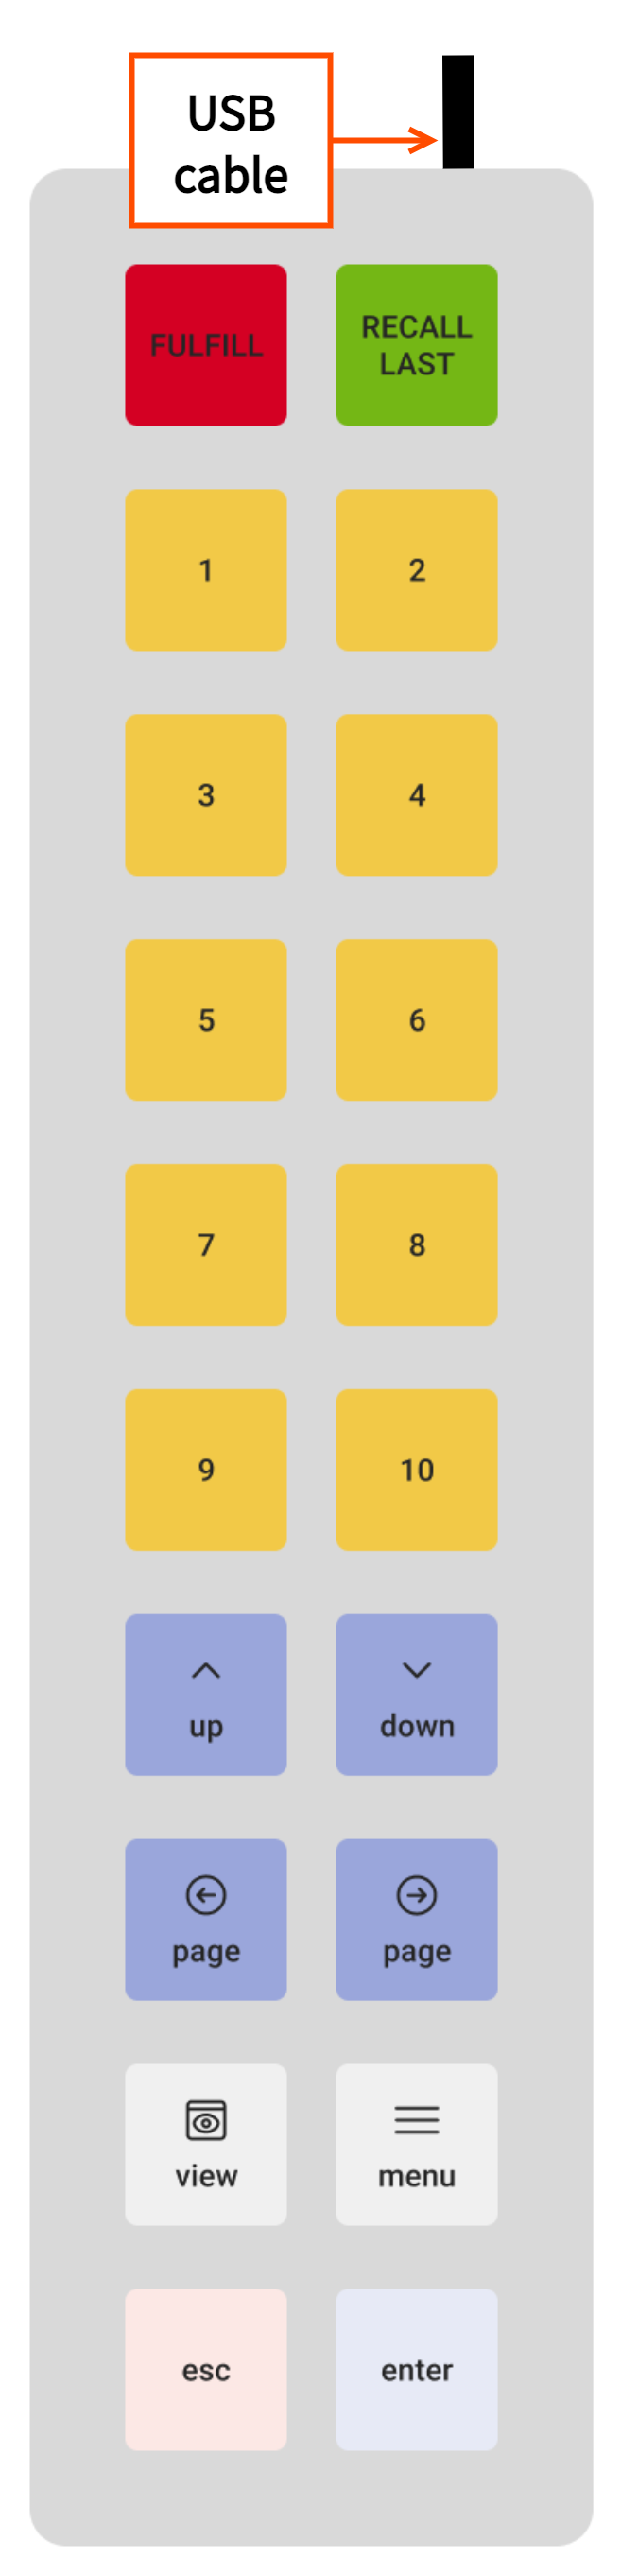
The vertical bump bar button layout:
-
-
Connect the USB-B connector end of the cable to the bump bar.
-
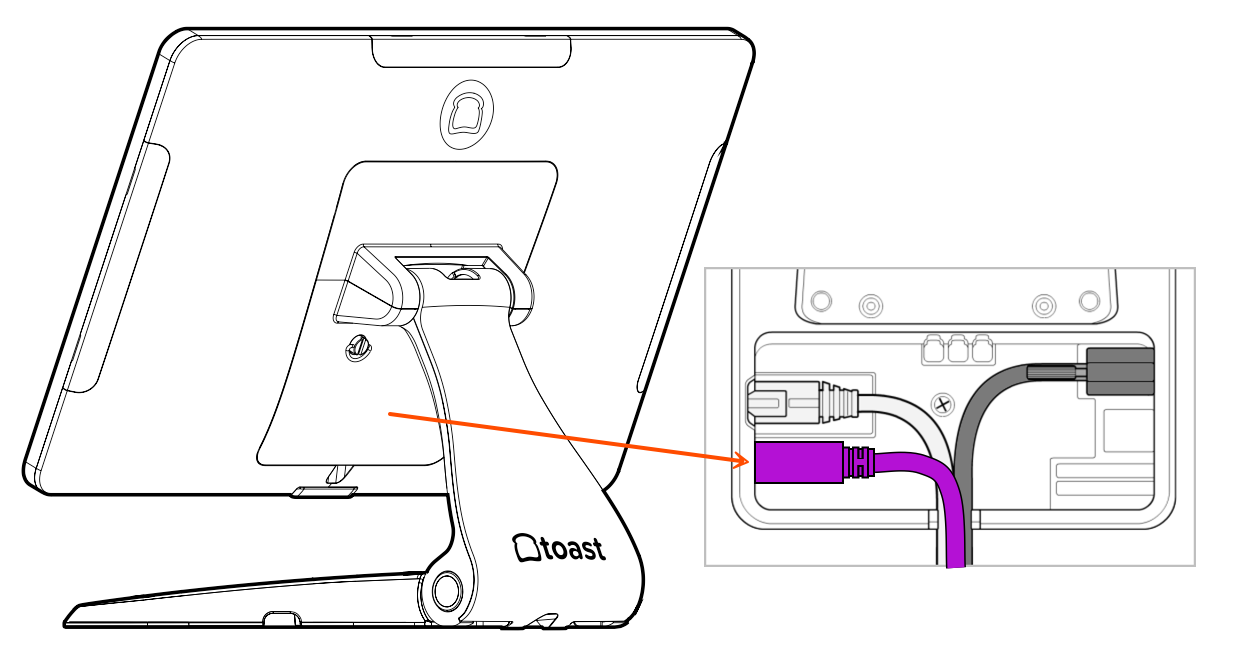
On the KDS device, remove the back cover. For more information about how to access the back pane, see the installation guides for Toast Flex 14 and Toast Flex 22.
Here is the location of the cable port on the Toast Flex 14.
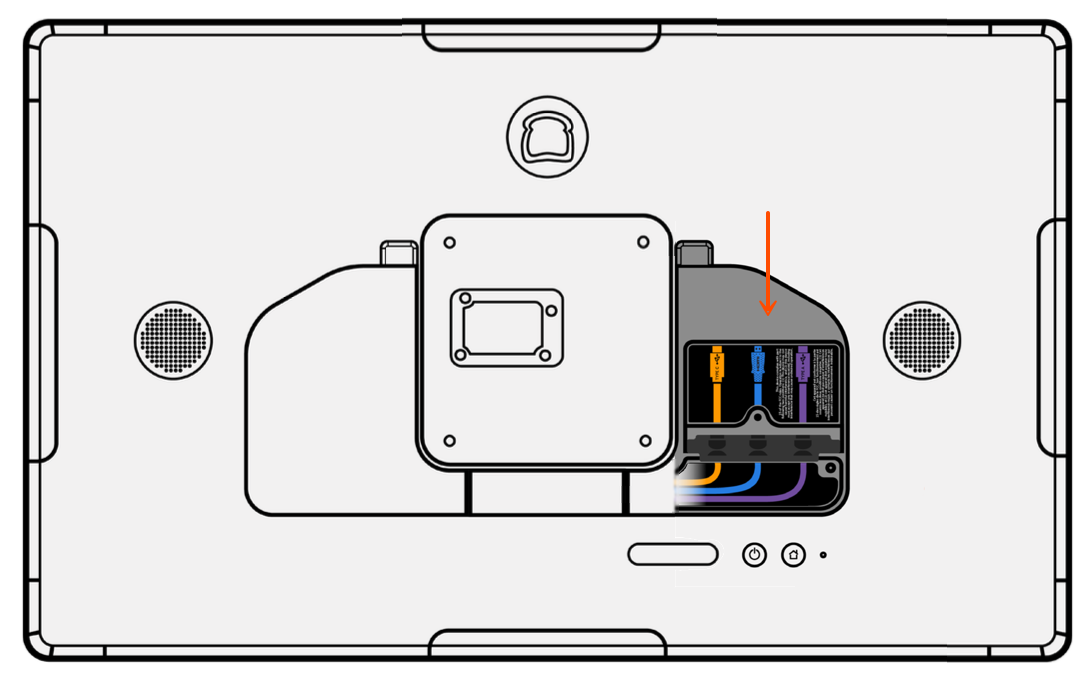
Here is the location of the cable ports on the Toast Flex 22.
-
Connect the other end of the cable to the available port on the KDS device. For Toast Flex devices, this is a USB-C connector, and for Elo devices, this is a USB-A or USB-C connector.
-
If you are currently using legacy KDS view on the KDS device, a dialog opens, asking you to switch to new KDS view. Select Switch to New KDS (Grid View). The KDS device switches to using new KDS view and a dialog opens, asking to start the bump bar setup.
Note
Bump bars only work with new KDS view.
-
Select Start setup. The screen changes to show options for selecting a button layout.
-
Select the corresponding layout, according to the orientation you choose for your bump bar:
-
Horizontal layout
-
Vertical layout
-
-
Select Save. The confirmation screen opens.
-
Select Done. The screen for the KDS device using new KDS view appears.
Once this bump bar is connected, these initial settings are saved if the bump bar is disconnected and reconnected successfully. If a different bump bar is connected, you need to repeat the initial setup process.
To set up the wireless bump bar to work with your KDS device, you first need to connect the wireless bump bar, and then complete the set up process for the wireless bump bar on your KDS device. Before starting, verify that your KDS device uses new KDS view.
|
Note |
|
The wireless bump bar is in limited release. |
To set up the wireless bump bar for your KDS device
-
Orient the bump bar to your choosing:
-
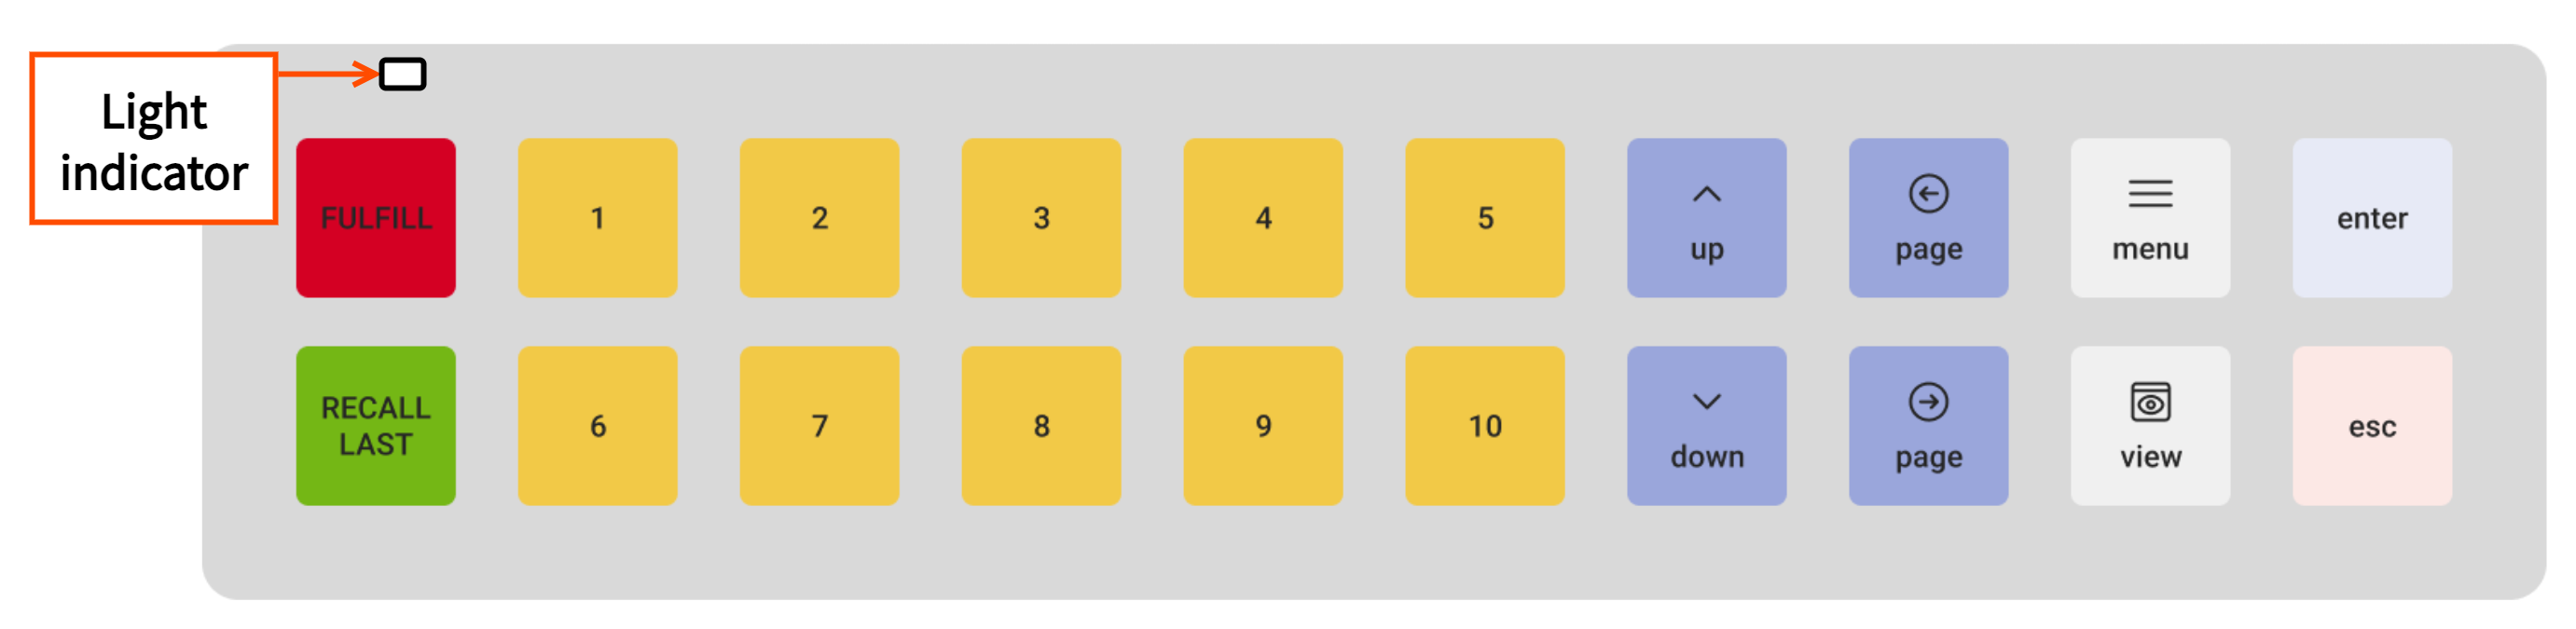
A horizontal orientation has the light indicator at the top left side of the bump bar.
-
A vertical orientation has the light indicator at the bottom left side of the bump bar.
-
-
If needed, remove the overlay insert and replace it with the layout matching your chosen orientation facing outward.
-
The horizontal bump bar button layout:
-
The vertical bump bar button layout:
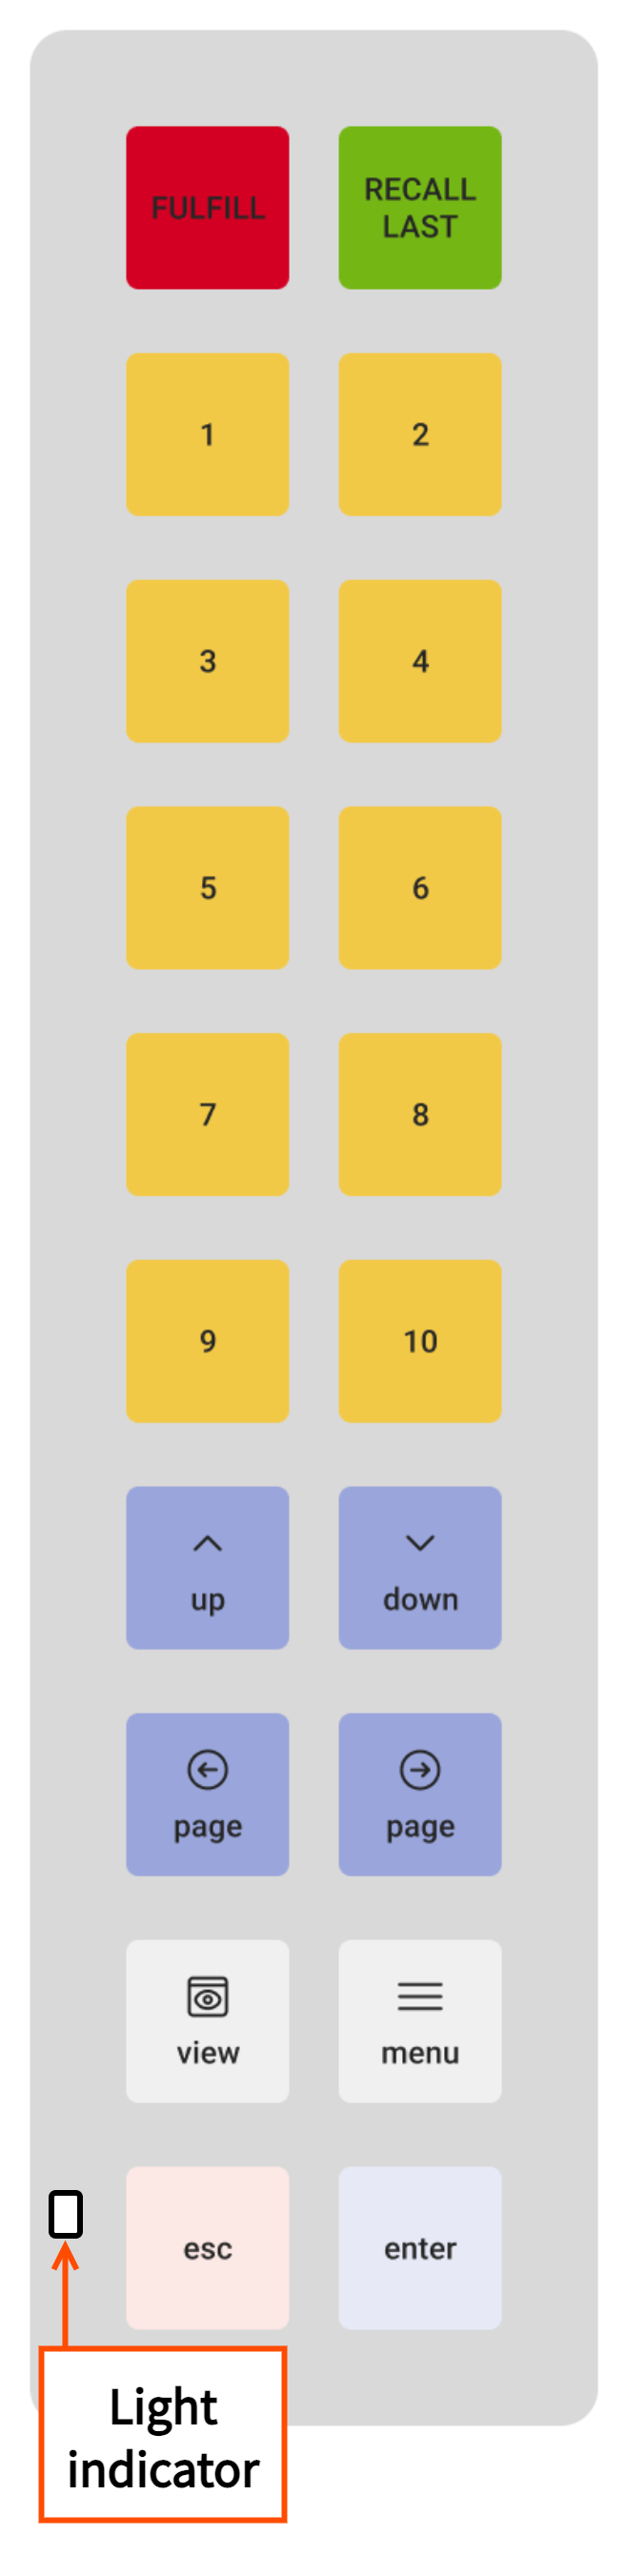
-
-
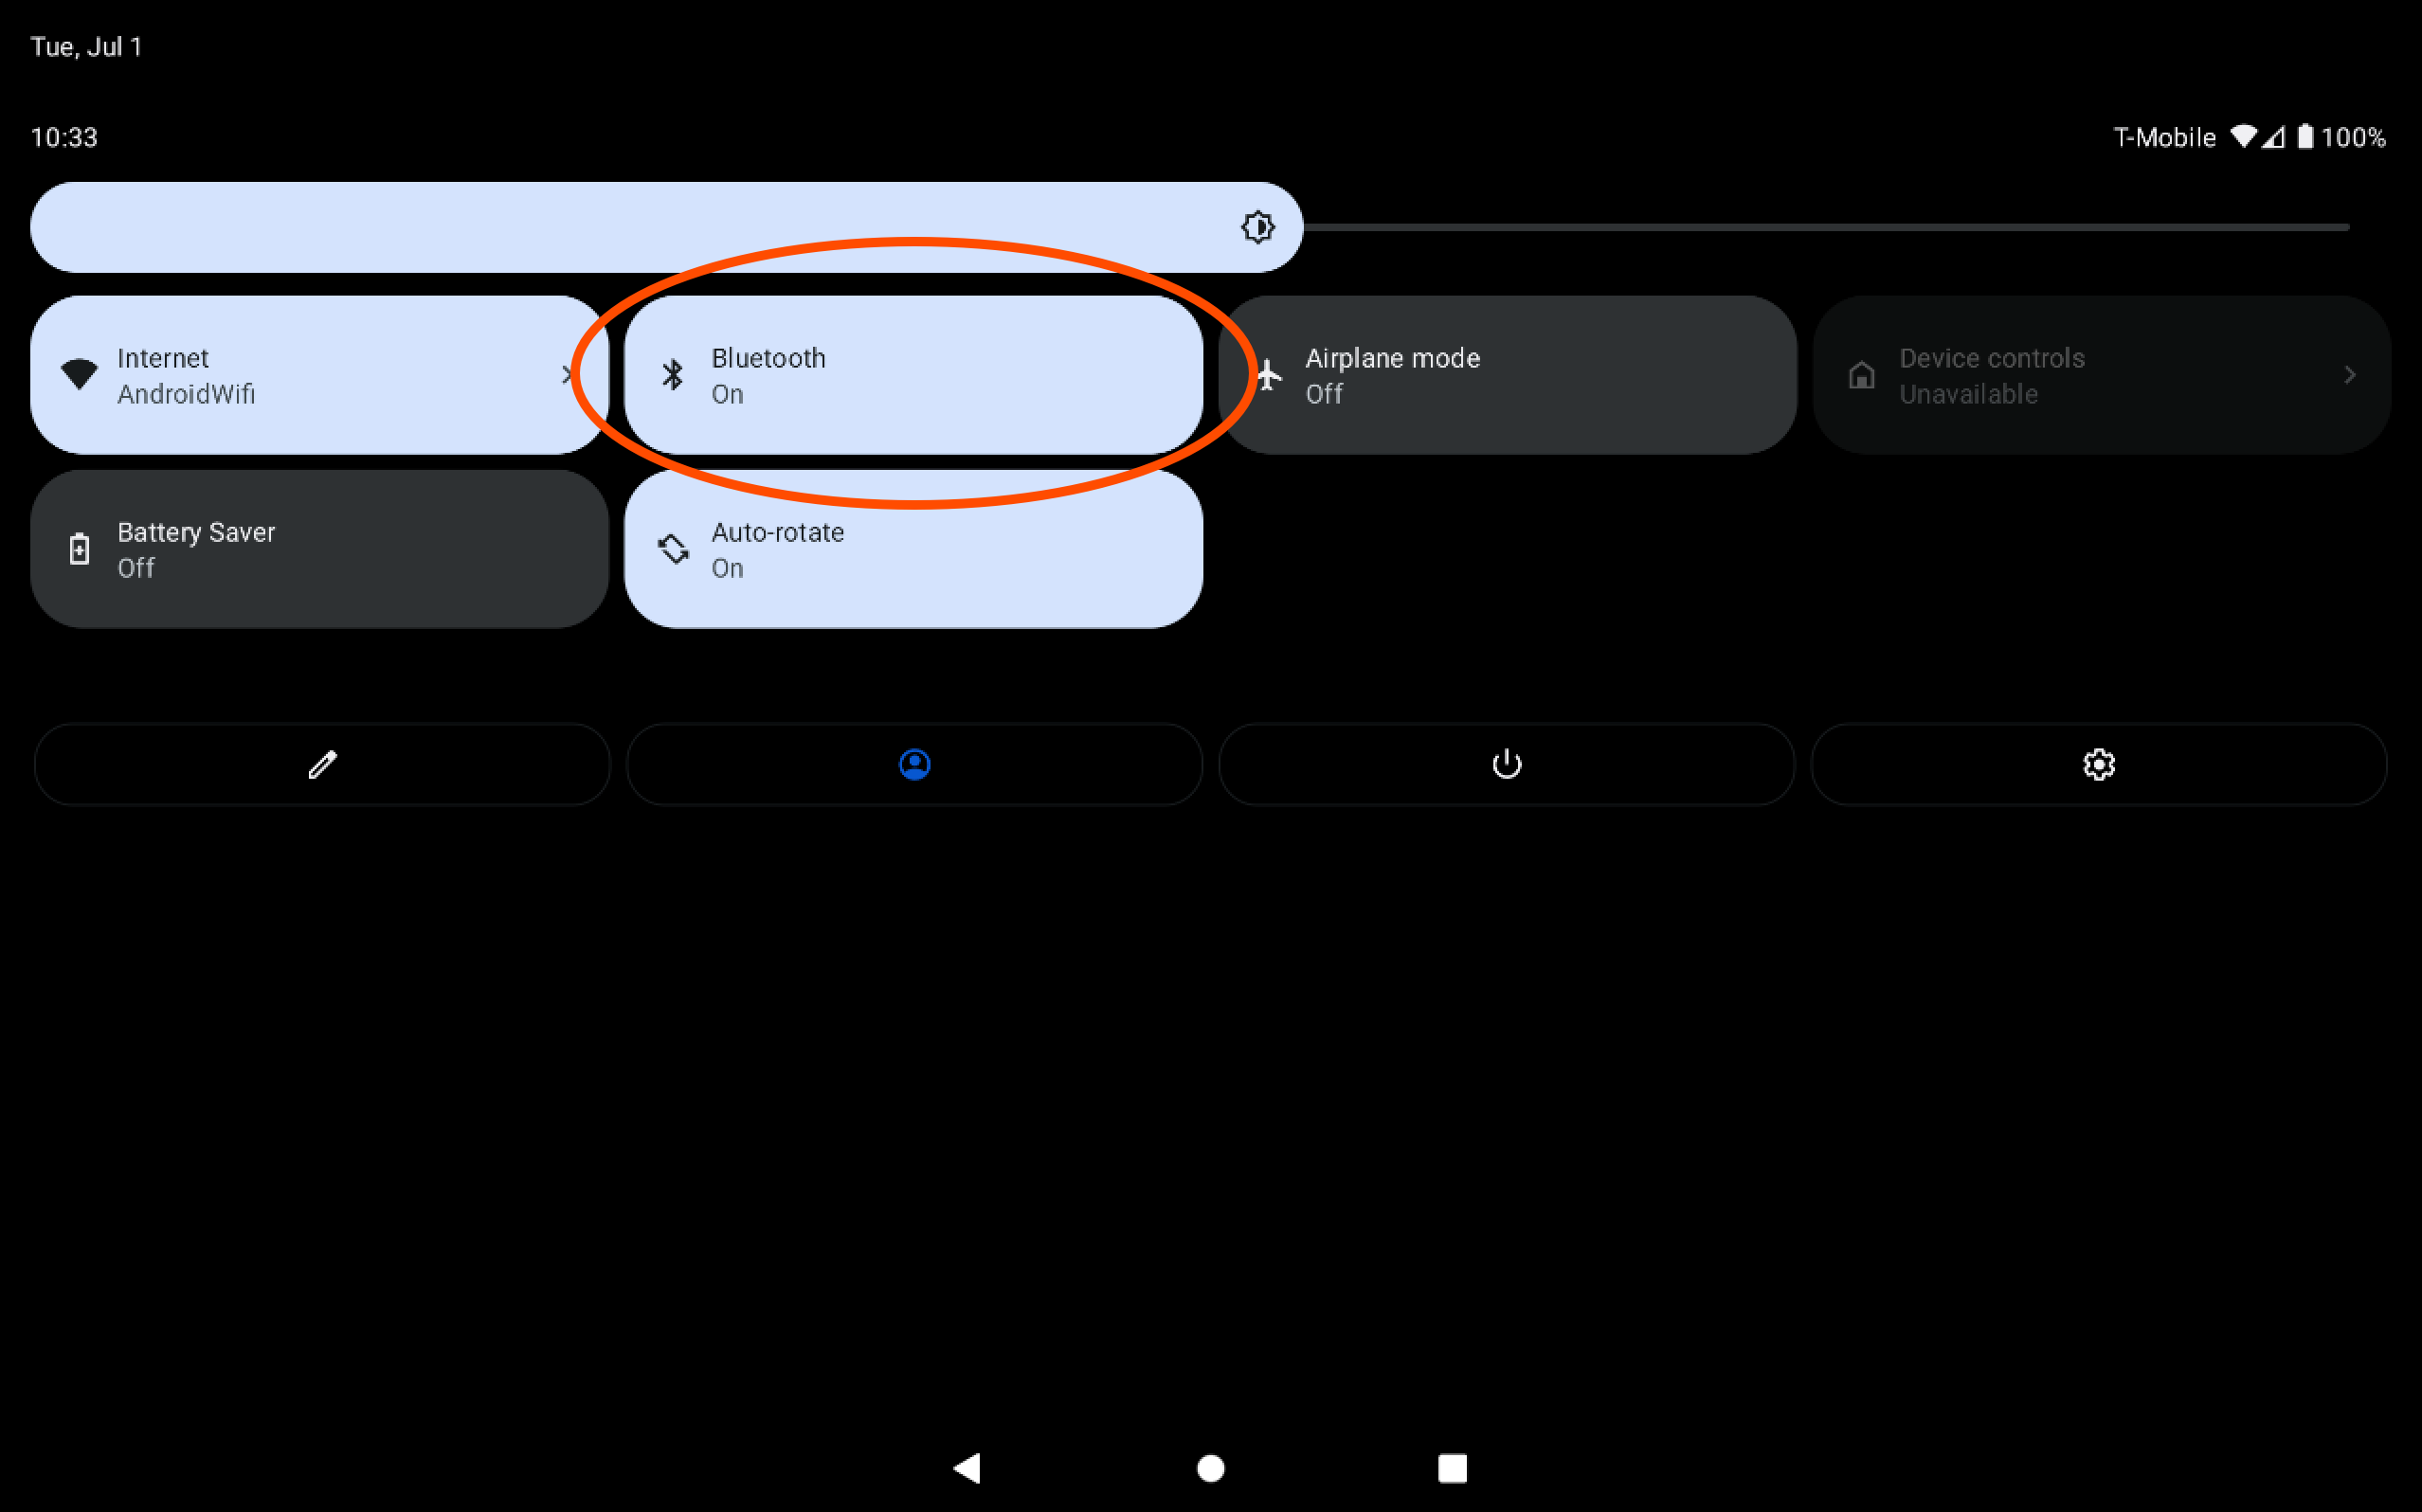
On your KDS device, drag downwards from the top of the screen. A menu appears.
-
Verify that the Bluetooth setting is set to ON.
-
Select and hold the Bluetooth button. The Connected devices screen opens.
-
Optionally if the wireless bump bar was previously connected to a different device, select and hold the following buttons on the wireless bump bar at the same time:
-
For horizontal orientation, the RECALL LAST, 6, and esc buttons.
-
For vertical orientation, the RECALL LAST, menu, and enter buttons.
This clears previously paired information from the wireless bump bar. If the bump bar plays a chime, and the light indicator above the FULFILL button blinks red, the action is successful. If it does not, release all buttons and try again.
-
-
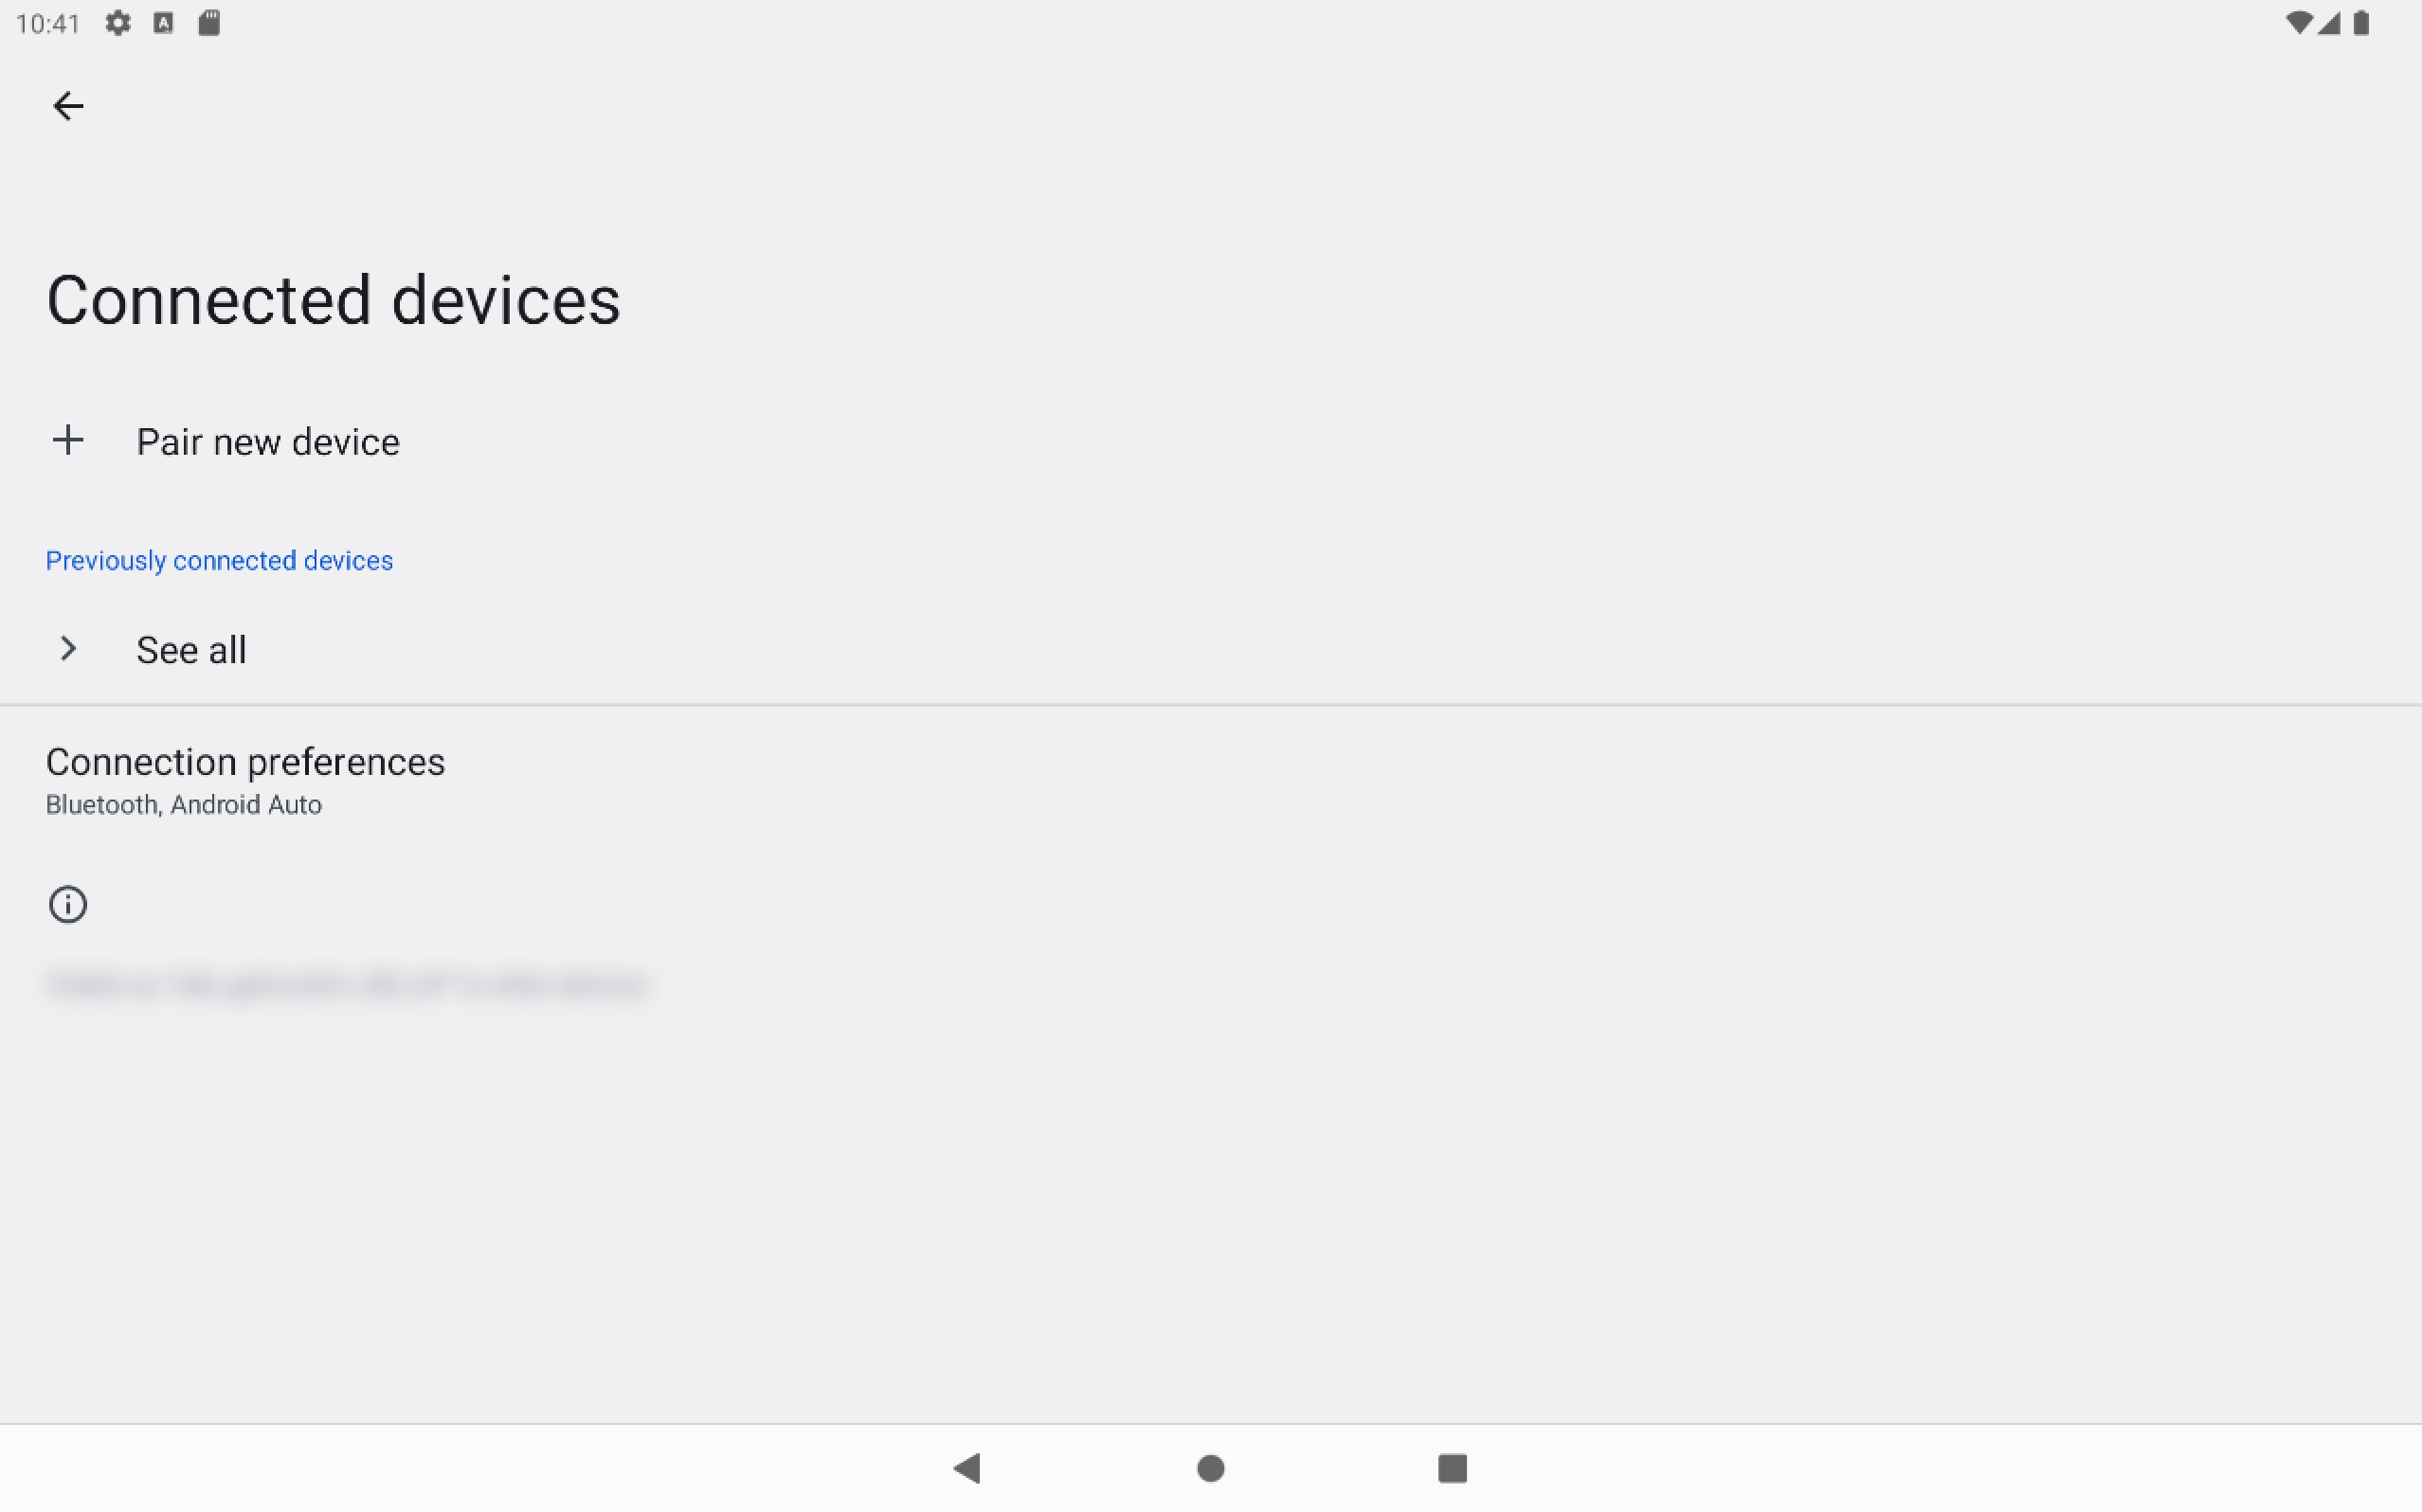
On the KDS device, select Pair new device on the Connected devices screen. The Pair new device screen opens.
-
On the bump bar, select and hold the FULFILL button until the light indicator above the button begins flashing purple, and then release the button. The flashing purple light indicates that the device is ready to pair.
-
On the KDS device on the Pair new device screen, look for a device with the name KRS- followed by a sequence of numbers and letters.
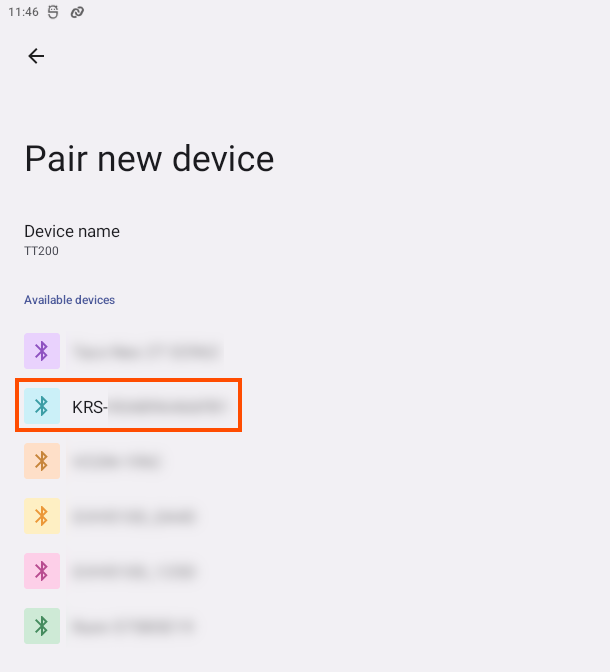
-
Select the KSR bump bar name. The Pair with dialog opens.

-
Select Pair. The KRS bump bar name appears in the list of connected devices on the Connected devices screen.
Note
If the pairing is not successful, select the device from the Available devices list on the Connected devices screen. If it does not succeed after three attempts, restart from Step 1.
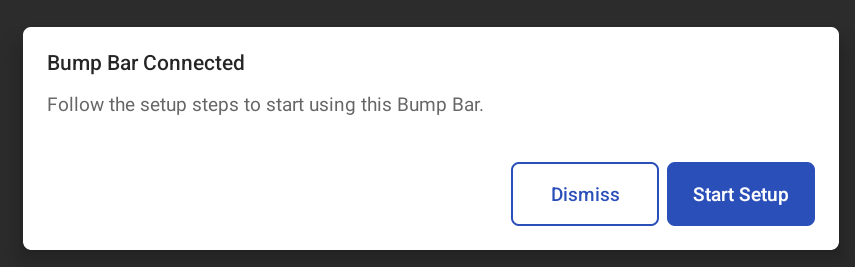
-
On the KDS device, the Bump Bar Connected dialog opens.
-
Select Start Setup. The screen changes to show options for selecting a button layout.
-
Select the corresponding layout, according to the orientation you choose for your bump bar:
-
Horizontal layout
-
Vertical layout
-
-
Select Save. The confirmation screen opens.
-
Select Done. The screen for the KDS device using new KDS view appears.