|
Note |
|
The start queue feature is only available for KDS devices using the new KDS view. |
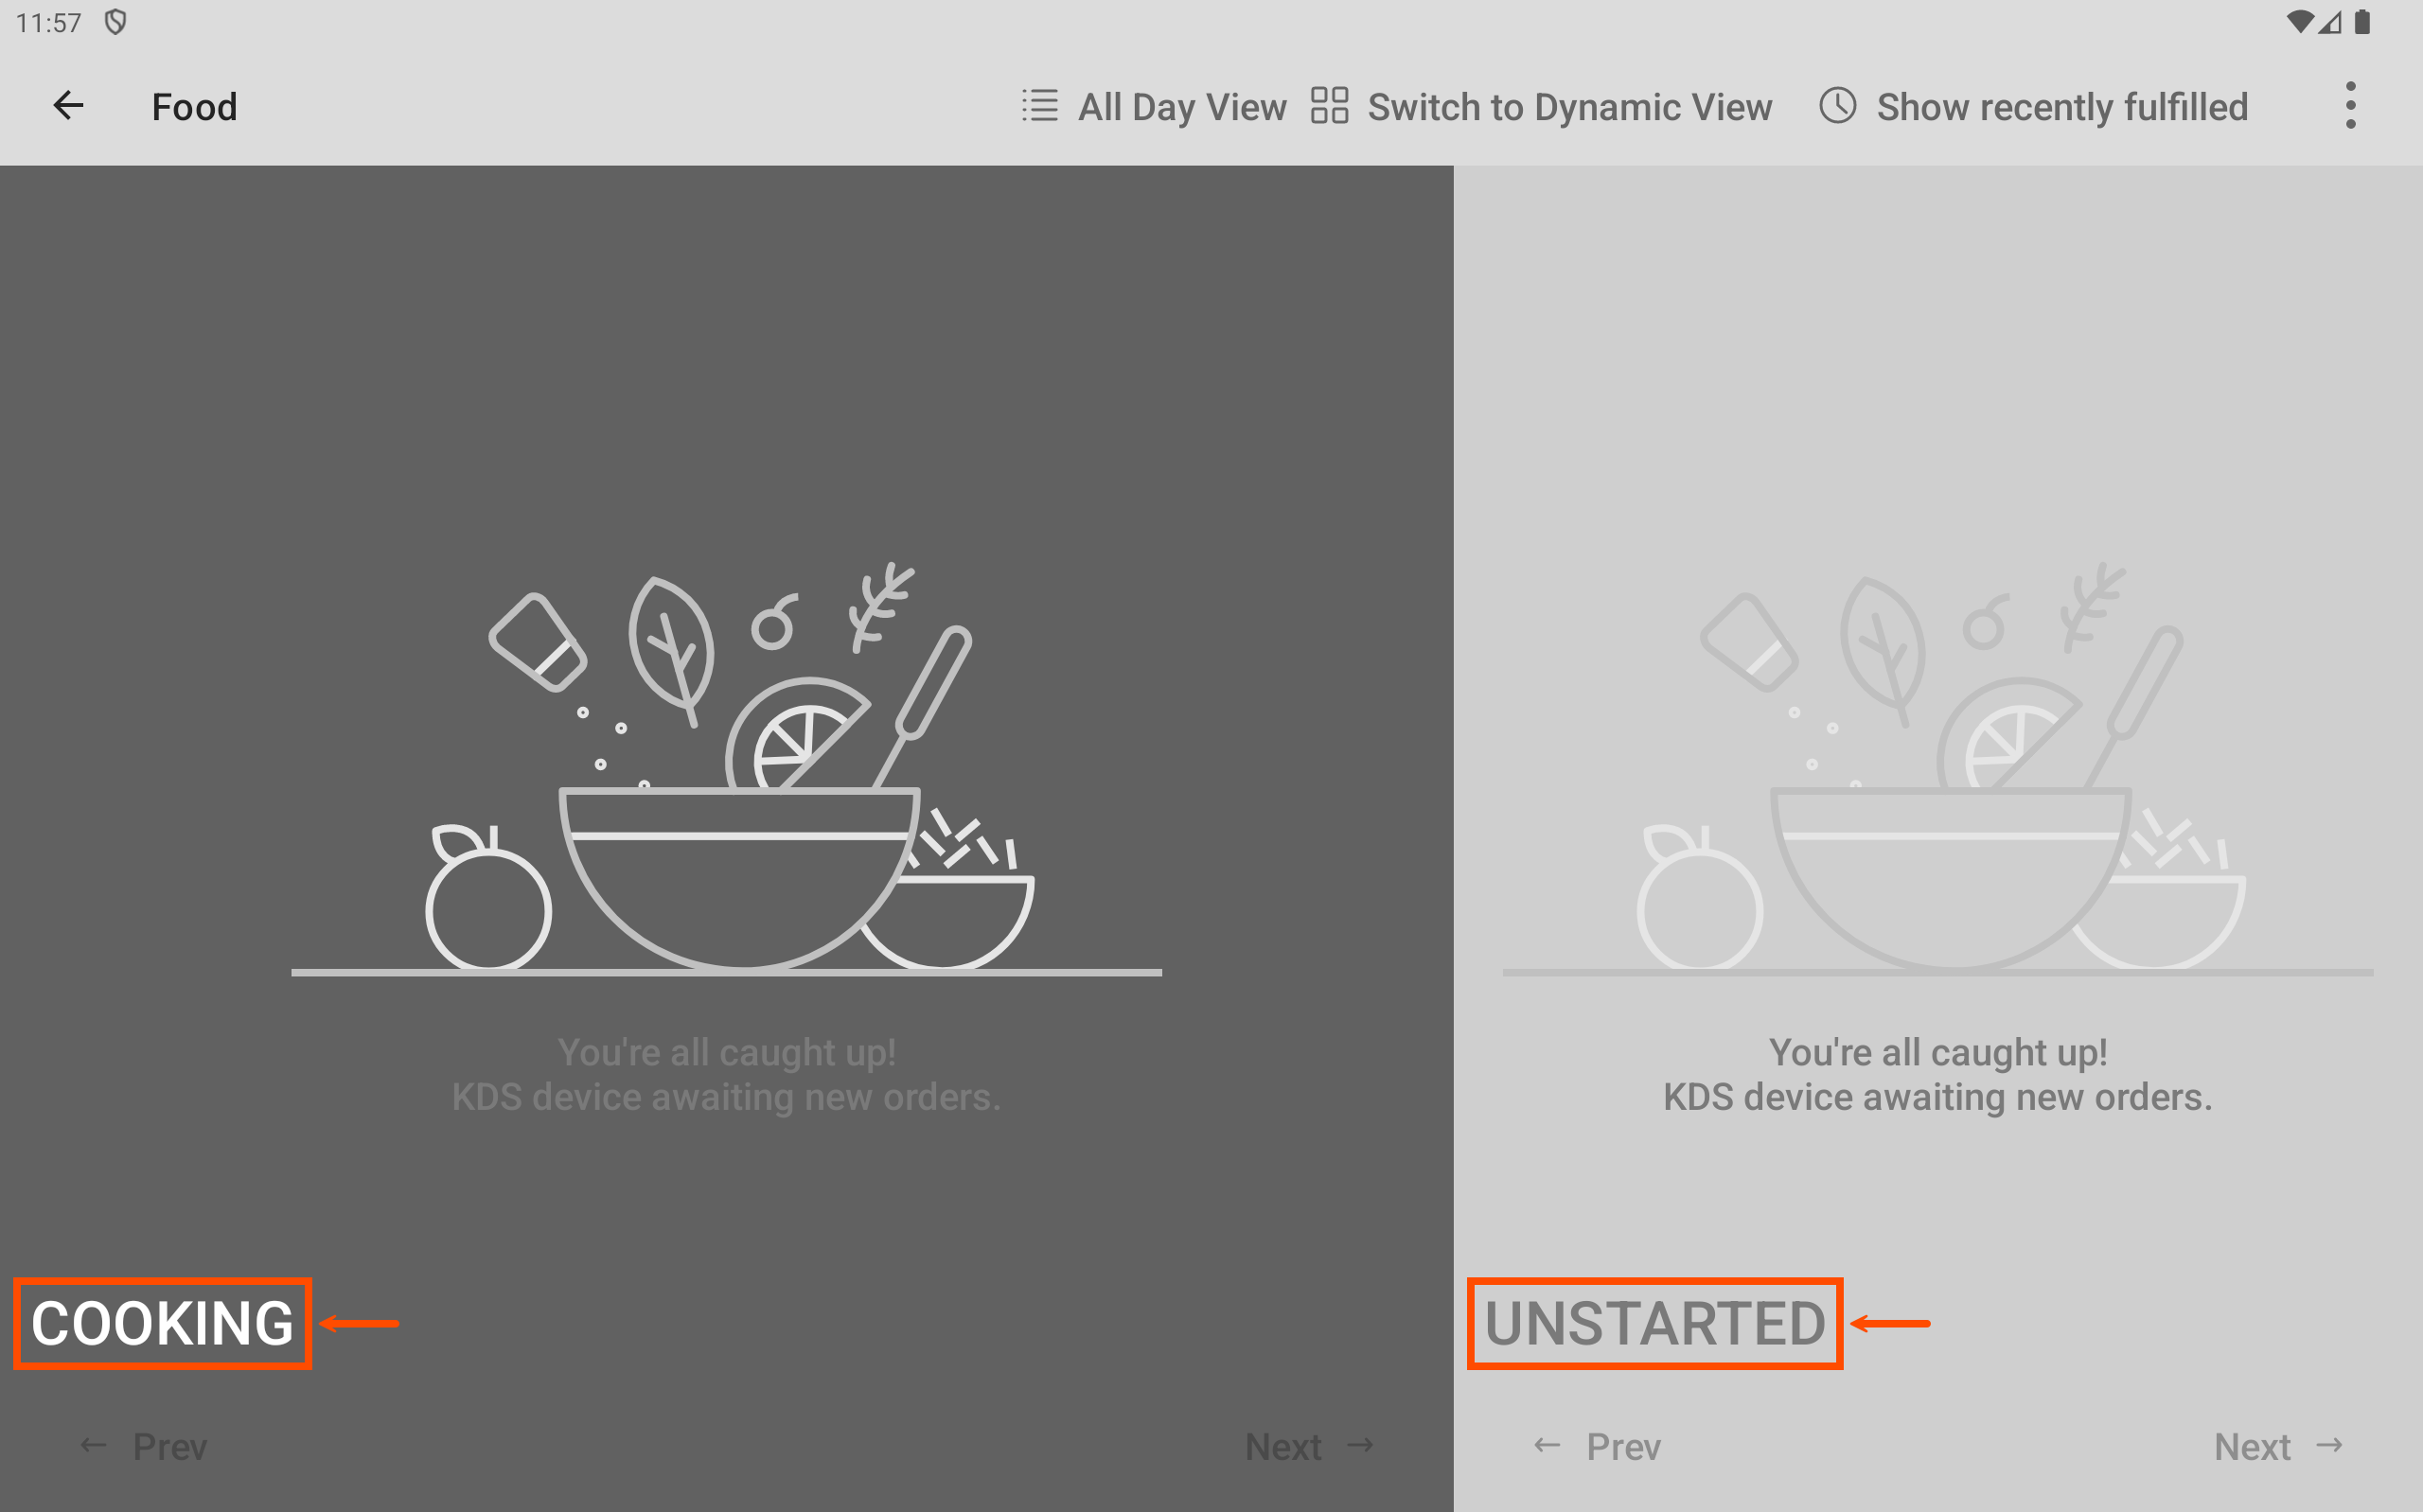
The start queue feature for KDS devices is used to visually separate which tickets are actively being worked on in the kitchen and which ones remain to be fulfilled. A prep station KDS device screen is divided into two sections: one for tickets being actively worked on, and the other for unstarted tickets. The sections are marked as COOKING and UNSTARTED.
When using a horizontal layout:
-
COOKING tickets appear on the left section.
-
UNSTARTED tickets appear on the right section.
When using a vertical layout:
-
COOKING tickets appear on the top section.
-
UNSTARTED tickets appear on the bottom section.
|
Note |
|
You can adjust the size of the UNSTARTED section using the KDS appearance pane. For more information, see KDS appearance pane. |
You can swipe left and right or use the navigation buttons at the bottom of each section to see additional tickets.
Here is an example of a prep station KDS with a horizontal layout.
|
Note |
|
The two sections only appear on prep station KDS devices. |
The appearance of KDS device tickets changes once a ticket is started. For expediter KDS device tickets:
-
Before the prep station ticket is started, the items are shown in italicized text on the expediter KDS device ticket.
-
After the prep station ticket is started, the items on the expediter KDS device ticket change from italicized to regular text and the orange partial fulfillment indicator appears next to each item. For more information, see Partial fulfillment indicator.
|
Note |
|
These changes appear on expediter KDS devices automatically if you've set the Start queue setting to either On - Manually turn on for each device or On - All devices at this restaurant. |
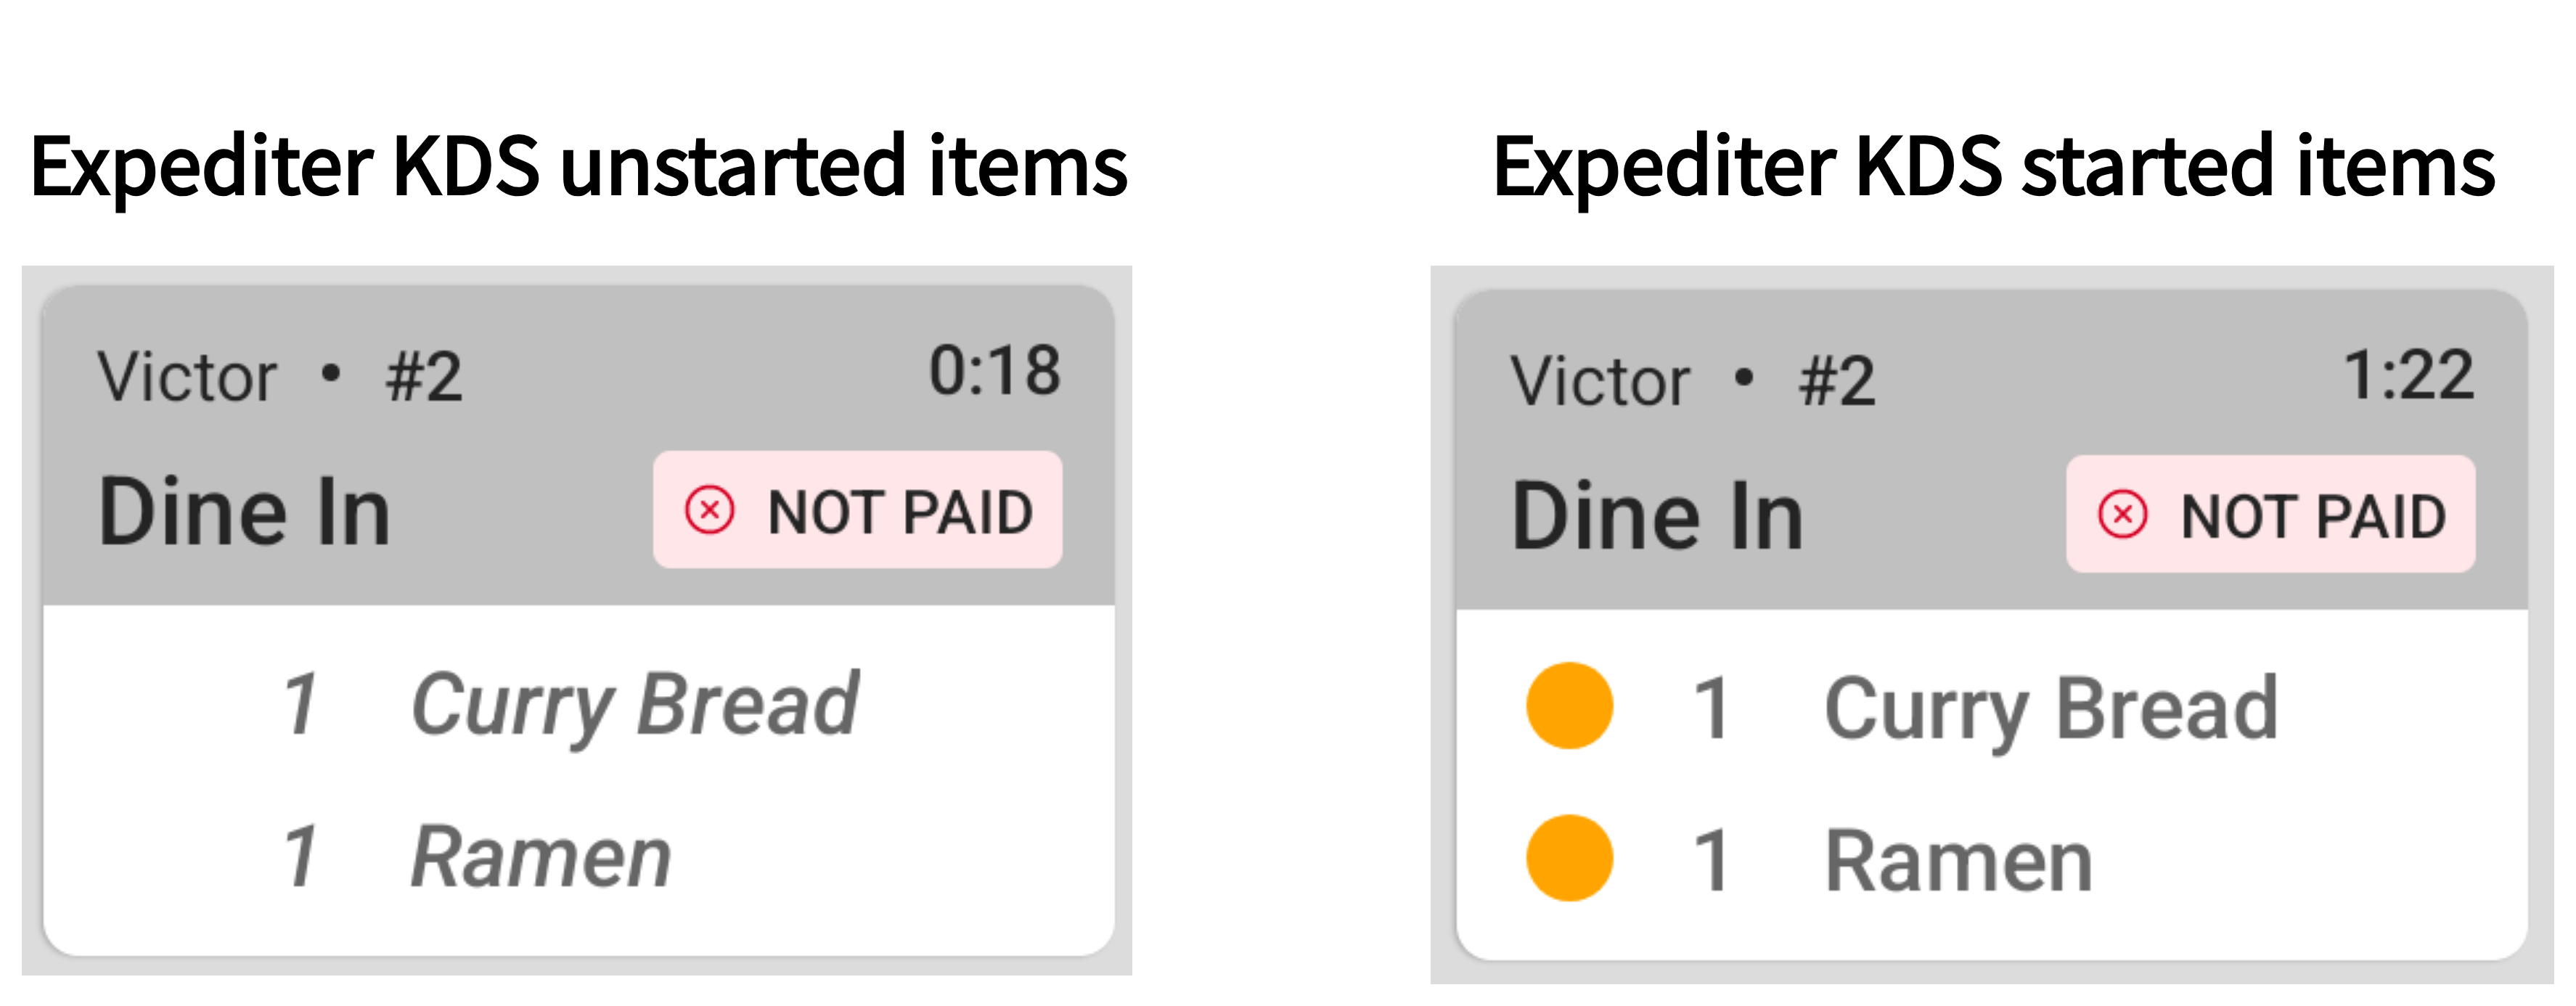
For prep station KDS device tickets:
-
Before the ticket is started, the text color is gray and does not include the dining option and payment status information.
-
After the ticket is started, the text color changes to black or white depending on whether your device is in light or dark mode and includes the dining option or payment status information.

There are three ways to configure how start queue is used at your location:
-
Off - No devices at this restaurant: This option turns off start queue at all devices at the location.
-
On - Manually turn on for each device: This option uses start queue at specifically configured devices. For example, some prep station KDS devices might have fewer items to fulfill that are easy to track. Another example is when items are easy and quick to fulfill. In these situations, having to indicate a ticket is started or is currently being worked on is unnecessary.
-
On - All devices at this restaurant: This option uses start queue at all devices at the location. For example, all prep station KDS devices have items that it will helpful to see whether or not it is currently being worked on.
To use start queue, you need to enable the Start queue setting on Toast Web.
To use start queue at your location
-
Go to Kitchen > Printers, tickets, & KDS devices > Kitchen and ticket setup.
-
Go to the Ticket Screens section, and then to the Start queue setting.
-
Select the option that best suits your location:
-
Off - No devices at this restaurant
-
On - Manually turn on for each device
Note
If you choose this option, you need to enable start queue on each device. For information about how to configure your device, see To configure start queue on a KDS device.
-
On - All devices at this restaurant
-
-
Save and publish your changes.
If you choose to manually turn on start queue for each device, you also need to configure start queue on the KDS device.
|
Note |
|
You cannot enable start queue on expediter KDS devices. |
To configure start queue on a KDS device
-
In the Kitchen Setup section, select Use Start Queue on this Device. The start queue workflow opens.
-
Select the option that best suits the device:
-
Disabled: This device will not use start queue.
-
Enabled: This device will use start queue.
-
-
Select Save. The workflow closes and you are returned to the Device Setup screen.
|
Note |
|
You can only start and revert starting tickets on prep station KDS devices. |
To start a ticket, select the ticket on the UNSTARTED part of the prep station KDS device screen. The ticket moves from the UNSTARTED part to the COOKING part of the screen. If you use multiple prep stations and independent prep station fulfillment, including assembly lines, you need to start tickets at each assigned prep station.
|
Note |
|
If you have the prep station KDS device use Double tap to fulfill, you can only fulfill the ticket if it is on the COOKING part of the screen. A single or double-tap while the ticket is on the UNSTARTED part of the screen can only start the ticket. |
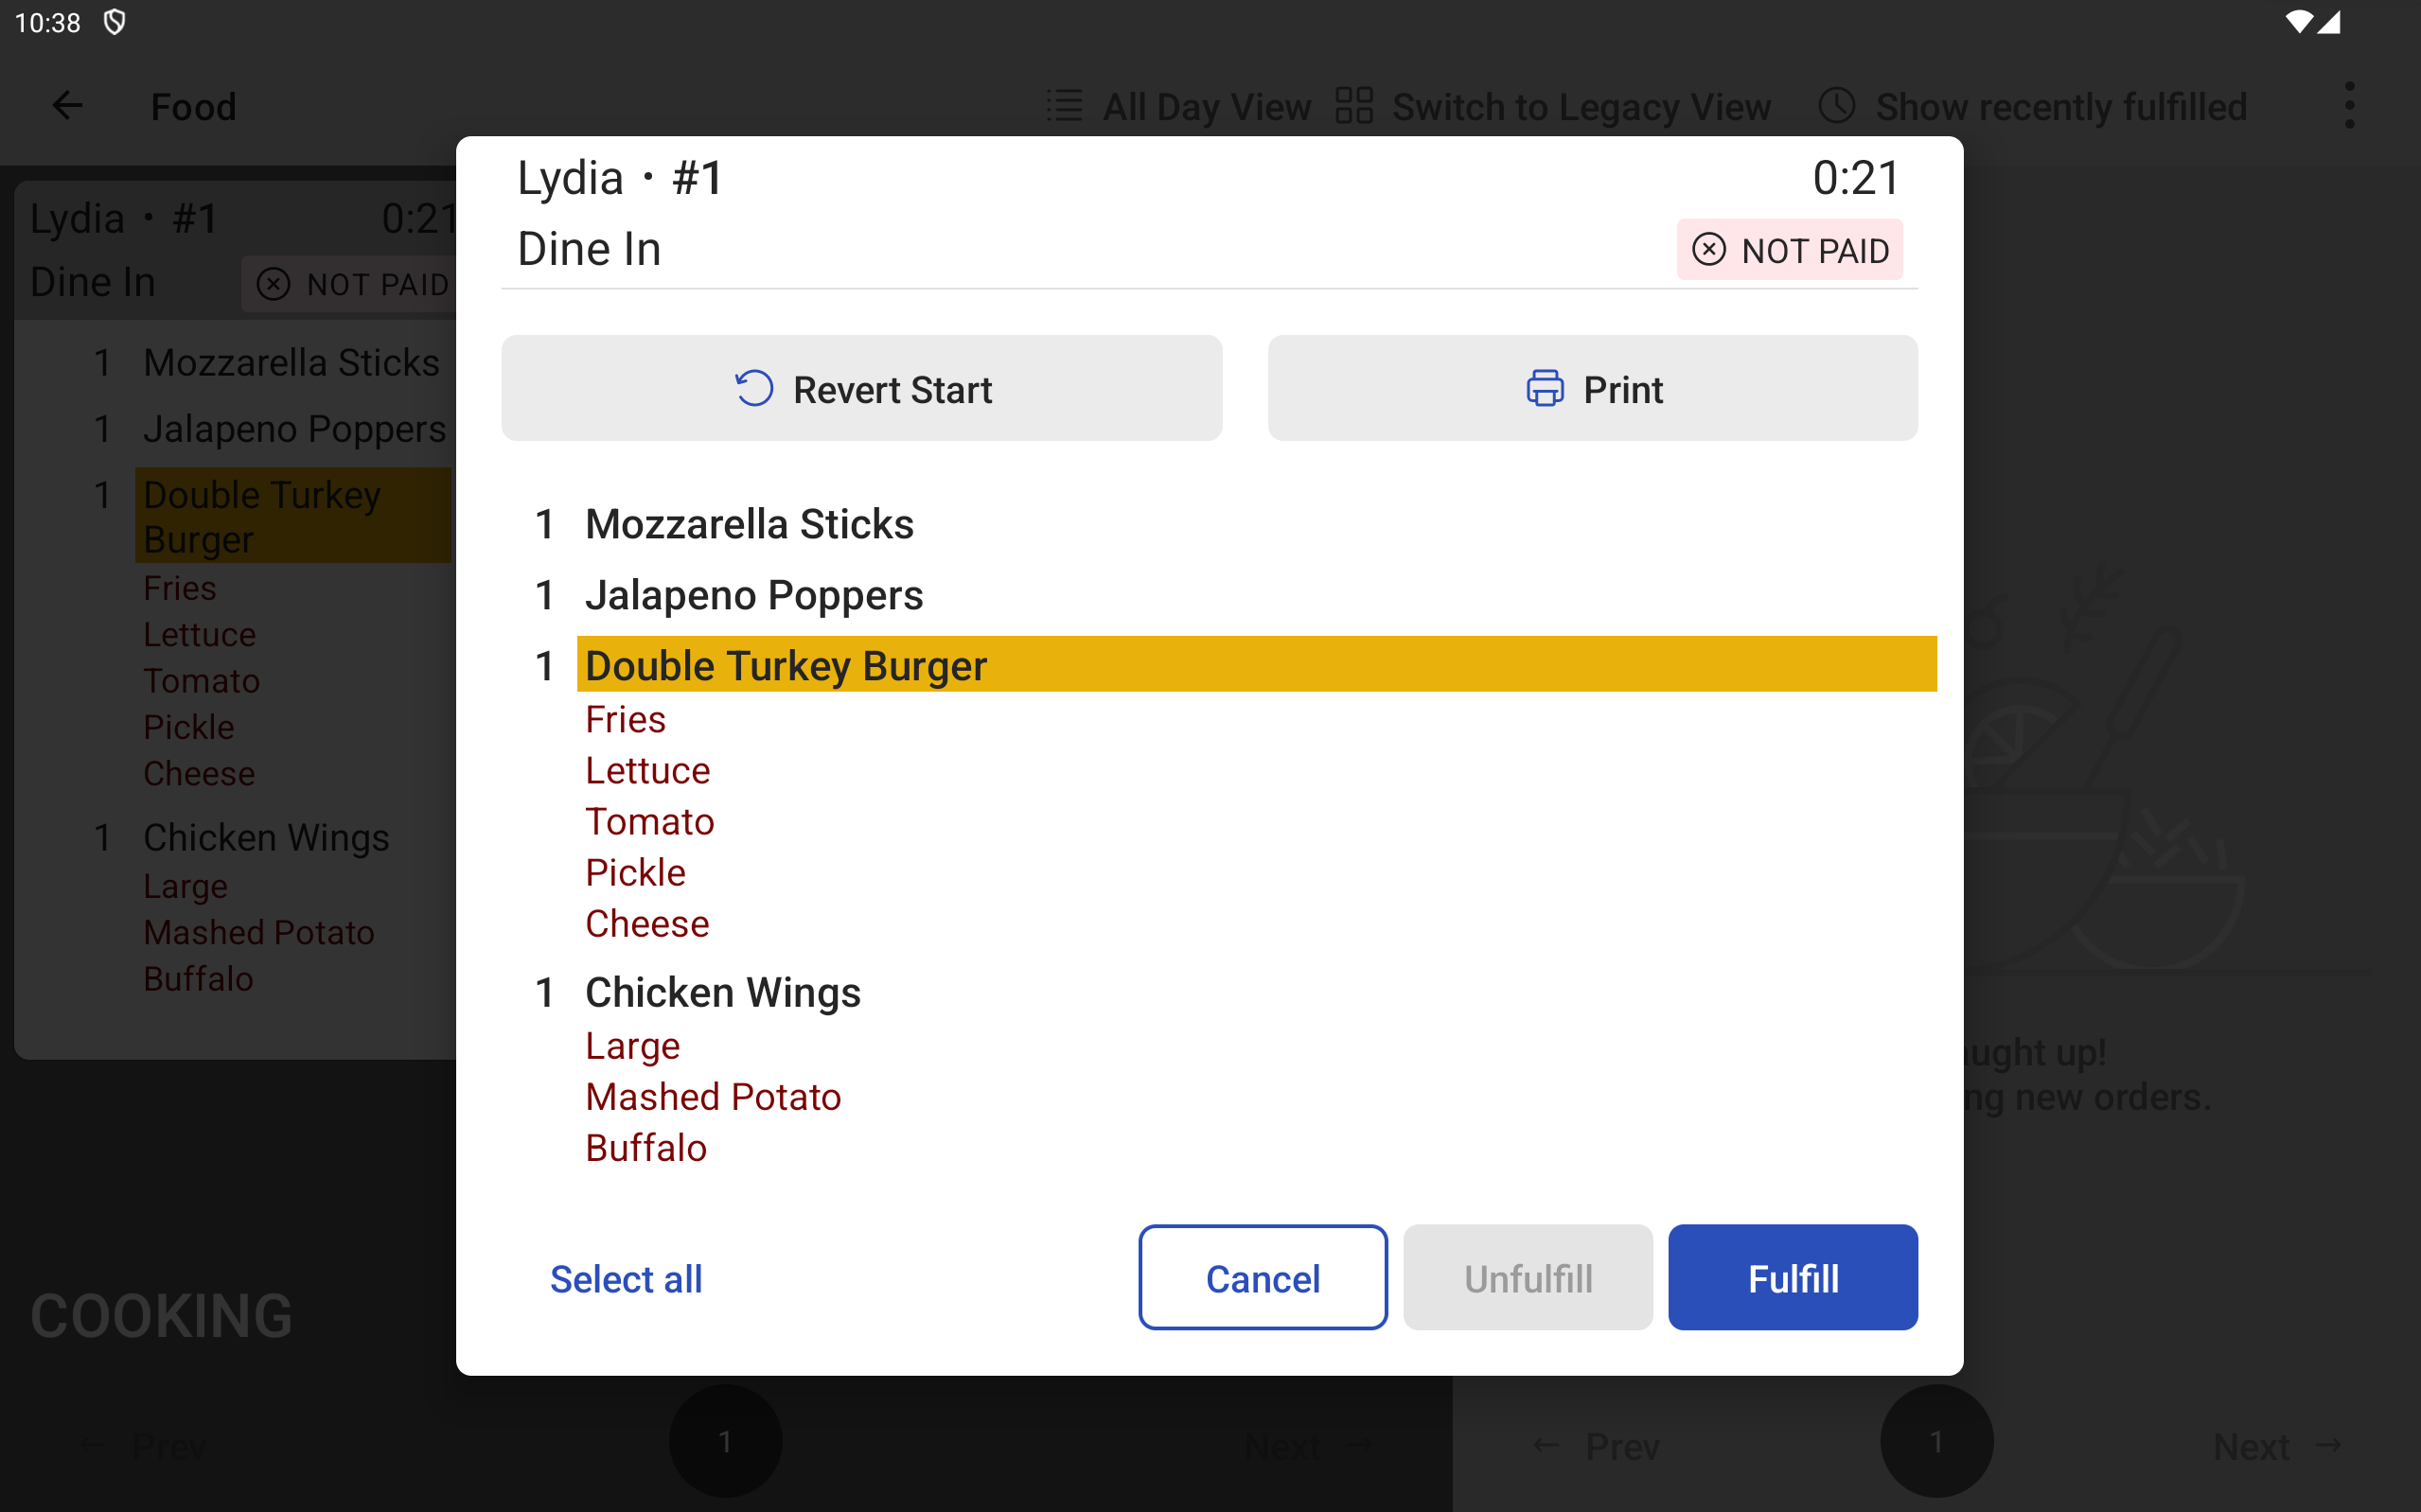
If you accidentally start a ticket, select the ticket to open the dialog. Select the Revert Start button. You can only revert a ticket, not individual items. You will need to start the ticket again in order to continue the fulfillment process.
|
Note |
|
If you use individual item fulfillment and select an item in the ticket dialog, the Revert Start option is hidden. |
If you recall or unfulfill a ticket, you need to repeat the process of starting and fulfilling the ticket.
For an example of how the start queue workflow works, see KDS workflow using start queue.
When configuring the layout using the KDS appearance pane, you can select the number of columns you want to assign to the UNSTARTED portion of the screen using the Unstarted columns option. This option allows you to select the number of columns from the Columns option that you want to assign towards the UNSTARTED side of the screen. Toast Support recommends balancing the number of columns between the UNSTARTED and COOKING sides. For example, if you have nine columns and assign only one for the UNSTARTED section, tickets in the UNSTARTED section may be hard to read depending on the size of your device.