Similar to tax rates, Toast support recommends that, in an enterprise environment, you handle prep stations by creating a master version of each prep station and then creating location-specific versions of those masters for each location. This configuration makes it easier to assign prep stations to menu groups and items because only the master version of each prep station is shown, either on the Advanced properties page or on the menu entity's details page, reducing the number of prep stations you have to pick from (see Creating a master version with location-specific versions for every location for more information). When you select a master prep station for a menu entity, the Toast platform automatically calculates which version of the prep station to use at each given location.
Also similar to tax rates, you should remove any auto-created prep stations before creating the masters and their location-specific versions.
Unlike tax rates, printer configuration does not get shared between locations because printers can only physically exist in one location at a time. The expectation is that you will have a set of printers for each location, configured exclusively for that location with the Target and Owner fields set to that location. You can then assign those location-specific printers to the location-specific versions of each prep station. In an enterprise environment, therefore, the workflow is as follows:
-
You archive any auto-created prep stations.
-
You create master prep stations and accompanying location-specific versions of the prep stations.
-
You create location-specific printers.
-
You configure the location-specific prep stations to use the location-specific printers.
-
You assign the master prep stations to your menus/menu groups/menu items as needed.
-
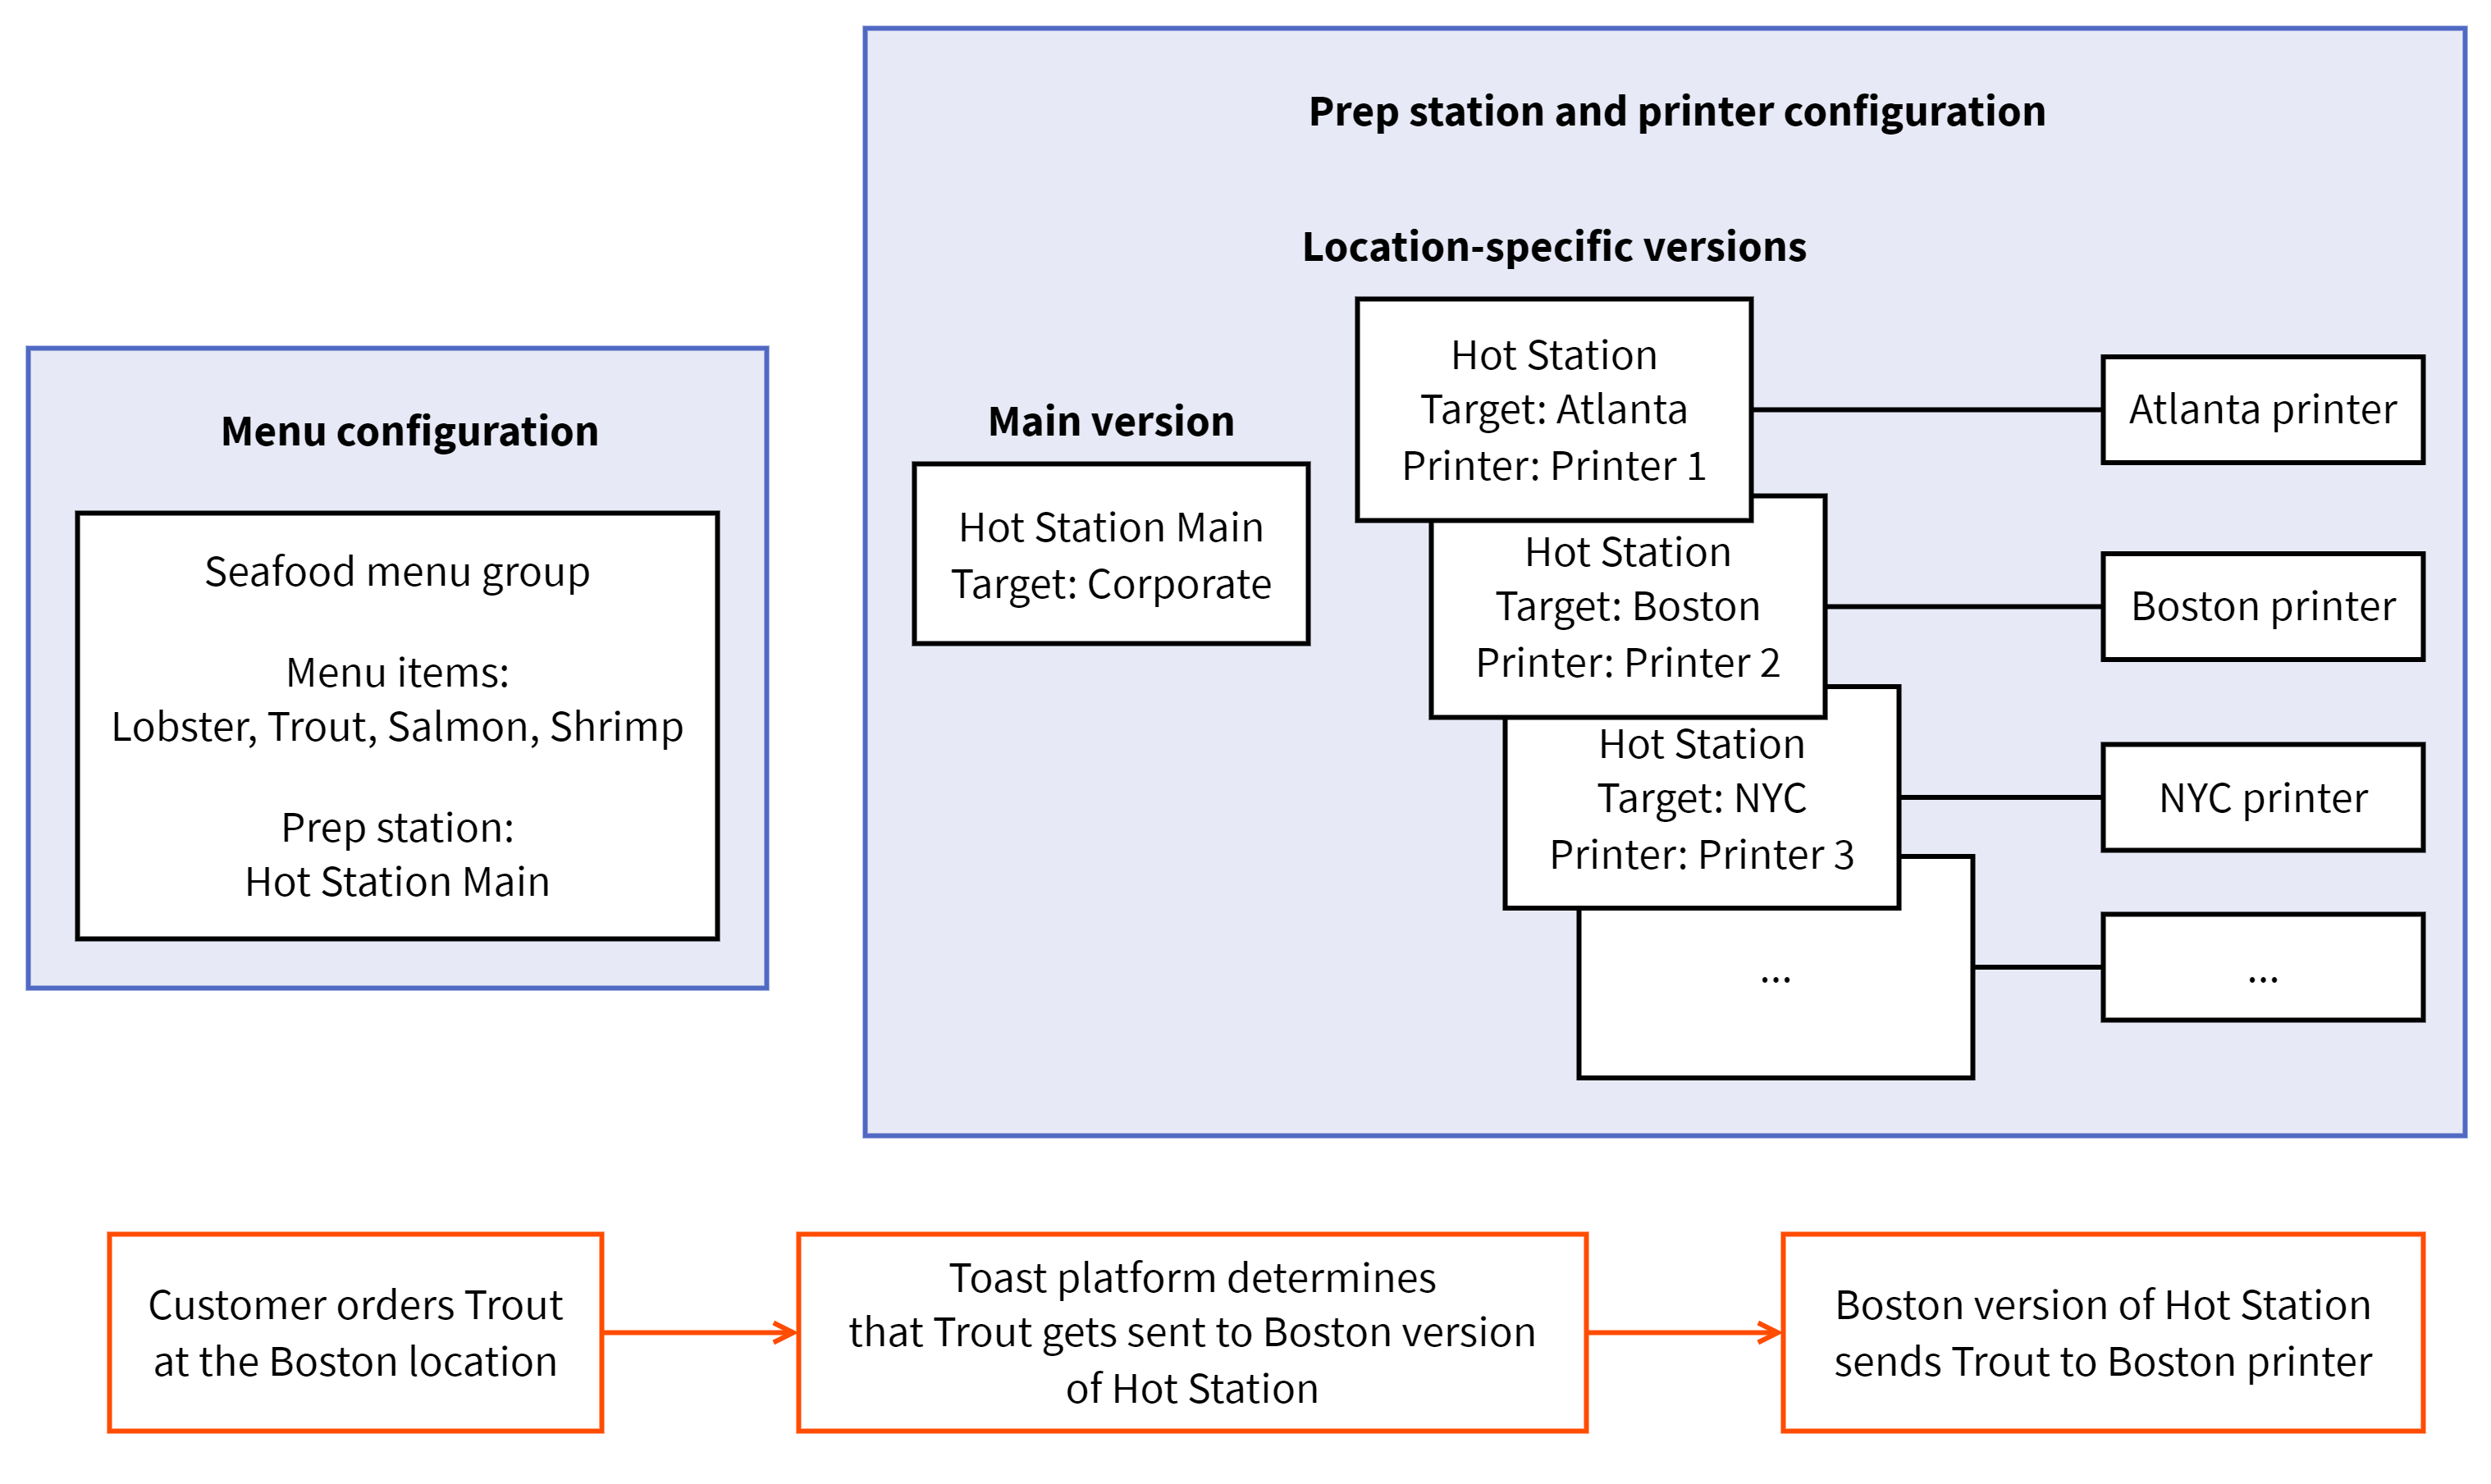
When a menu item is ordered, the Toast platform determines which location-specific version of the master prep station to use for the item.
-
That location-specific prep station determines which location-specific printer to use and sends the menu item to it.
For example, assuming the configuration in the illustration below, when the customer orders Trout at the Boston location, the Boston version of the Hot Station prep station is used and it sends the Trout order to the Boston printer.
To archive auto-created prep stations
-
Choose Kitchen > Kitchen stations > Prep stations to open the Prep stations page.
-
Use the You are viewing menu to show the prep stations for the corporate restaurant group (the corporate restaurant group is your top-level restaurant group and it should show all locations). See Filtering pages for information on the You are viewing menu.
-
Click the actions button for the prep station you want to archive and choose Archive from the menu.

-
Click Save.
-
Repeat these steps for the other prep stations that were automatically created.
-
Continue with the next procedure to create master prep stations.
To create master prep stations
-
Choose Kitchen > Kitchen stations > Prep stations to open the Prep stations page.
-
Use the You are viewing menu to show the prep stations for the corporate restaurant group (this group will show all locations). See Filtering pages for information on the You are viewing menu.
-
Click the plus button to add a new prep station.

-
Enter a name for the prep station and set its other properties.
-
Set the Target and Owner fields to the corporate restaurant group.
-
Click Save.
-
Repeat these steps to add any other master prep stations your restaurants use.
-
Continue with the To create location-specific prep stations procedure.
To create location-specific prep stations
-
Choose Kitchen > Kitchen stations > Prep stations to open the Prep stations page.
-
Use the You are viewing menu to show the prep stations for the corporate restaurant group (this group should show all locations). See Filtering pages for information on the You are viewing menu.
-
Click the actions button for a master prep station and choose New Version.
-
Set the Target field to a location in your enterprise. The Owner field is automatically set to that same location. You can leave the Owner field as is or set it to some other point in the restaurant group hierarchy (the value you choose for this setting should be driven by who in your enterprise should be able to edit the prep station).
-
Click Submit. The new version is added to the Prep Stations table.
-
Configure the new version's properties so that they are appropriate for the location you chose in step 4.
-
Click Save.
-
Repeat these steps to create a version of each master prep station for every location in your enterprise.
-
Publish your changes using the Publish config page. See Publishing changes for multiple locations for information on accessing and using that page.