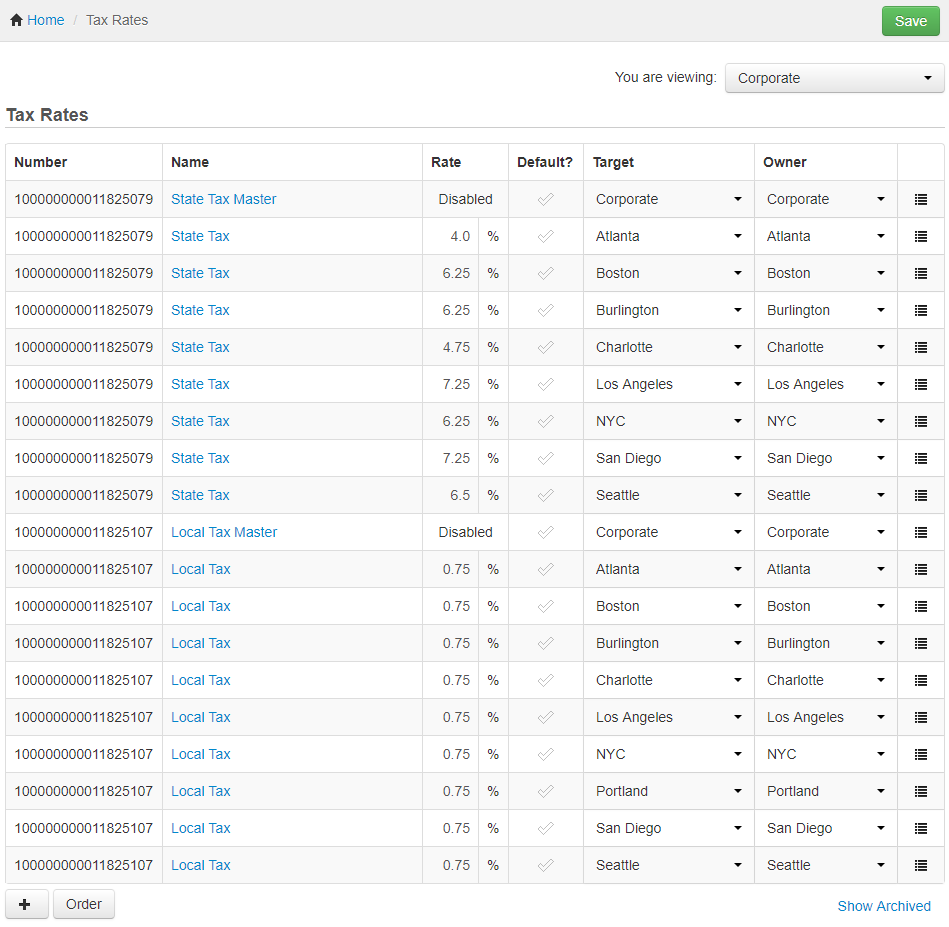
The preferred technique for managing taxes is to manually assign the master versions of your tax rates to your menus. With this configuration, the correct version of the tax will be applied to a menu, depending on location. For example, assuming the following tax rates, if the current location is Boston, the state tax would be 6.25% while when the current location is Atlanta, the state tax is 4%.
To assign tax rates manually
-
Choose Menus > Menu management > Tax rates setup to open the Tax rates page.
-
Use the You are viewing menu to show the tax rates for the corporate restaurant group (this group should show all locations). See Filtering pages for information on the You are viewing menu.
-
Make sure your tax rates are not marked as default.
-
Choose Menus > Bulk management > Advanced properties to open the Advanced properties page.
-
Use the You are viewing menu to view the menus you want to assign taxes to.
-
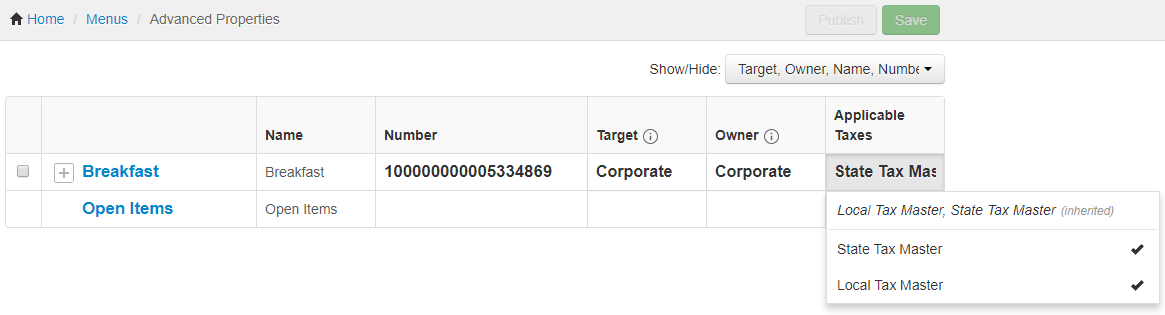
Click the Show/Hide menu, scroll down to the Taxes section and check the Applicable Taxes option to display that column on the Advanced properties page.
-
In the row for the menu you want to apply taxes to, click the Applicable Taxes field.
-
All of the master tax rates you have created are listed below the line in the Applicable Taxes field. Click a master tax rate to select it and apply its taxes to this menu. To deselect a master tax rate, click it again to remove the checkmark. Check all of the master tax rates that should apply to this menu, for example:
-
Click Save.
-
Repeat these steps for each menu.
-
Publish your changes using the Publish config page. See Publishing changes for multiple locations for information on accessing and using that page.