This section provides general information that applies to all menu manager views.
When you select the name of a menu entity from the menu hierarchy table in Full menu view, a side pane opens with details for that entity. The side pane lets you quickly configure your menu entities without leaving Full menu view.
(Multi-location only) If you do not have the 4. Restaurant Admin > 4.5 Edit Full Menu permission to the owner of a menu entity, the side pane still opens so you can see the entity's configuration, but a banner at the top of the pane indicates that the information is read-only. For more information, see Permissions for editing menus.
|
Note |
|
You must have the 4. Restaurant Admin > 4.5 Edit Full Menu permission to see Full menu view. Employees with the 4. Restaurant Admin > 4.14 Local Menu Edit permission cannot see Full menu view. |
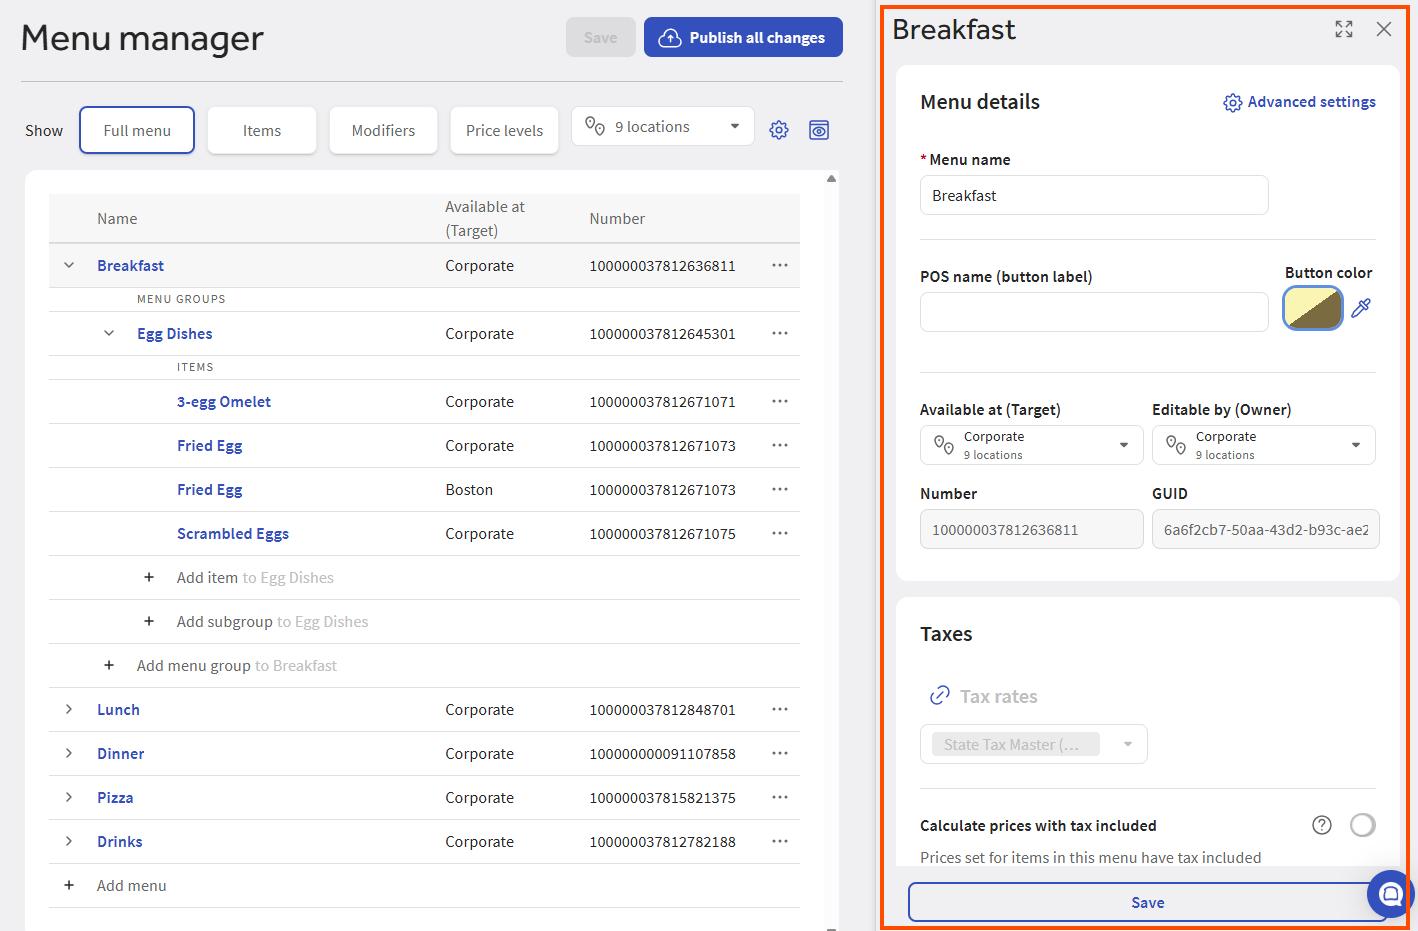
The side pane shows a shortened version of the menu entity's details page. To view the entire details page, select the full screen icon in the upper-right corner of the side pane. Alternatively, if you select a menu entity in the menu hierarchy table while its side pane is visible, the full details page opens.
To close the side pane, select the close icon in the upper-right corner of the side pane.
To save changes you make in the side pane, use the Save button that appears at the bottom of the pane. Note that other changes you make in Full menu view, outside of the side pane (for example, adding a menu or re-ordering your menu groups), are automatically saved. If you close the side pane without selecting the Save button, changes you have made in the pane are discarded.
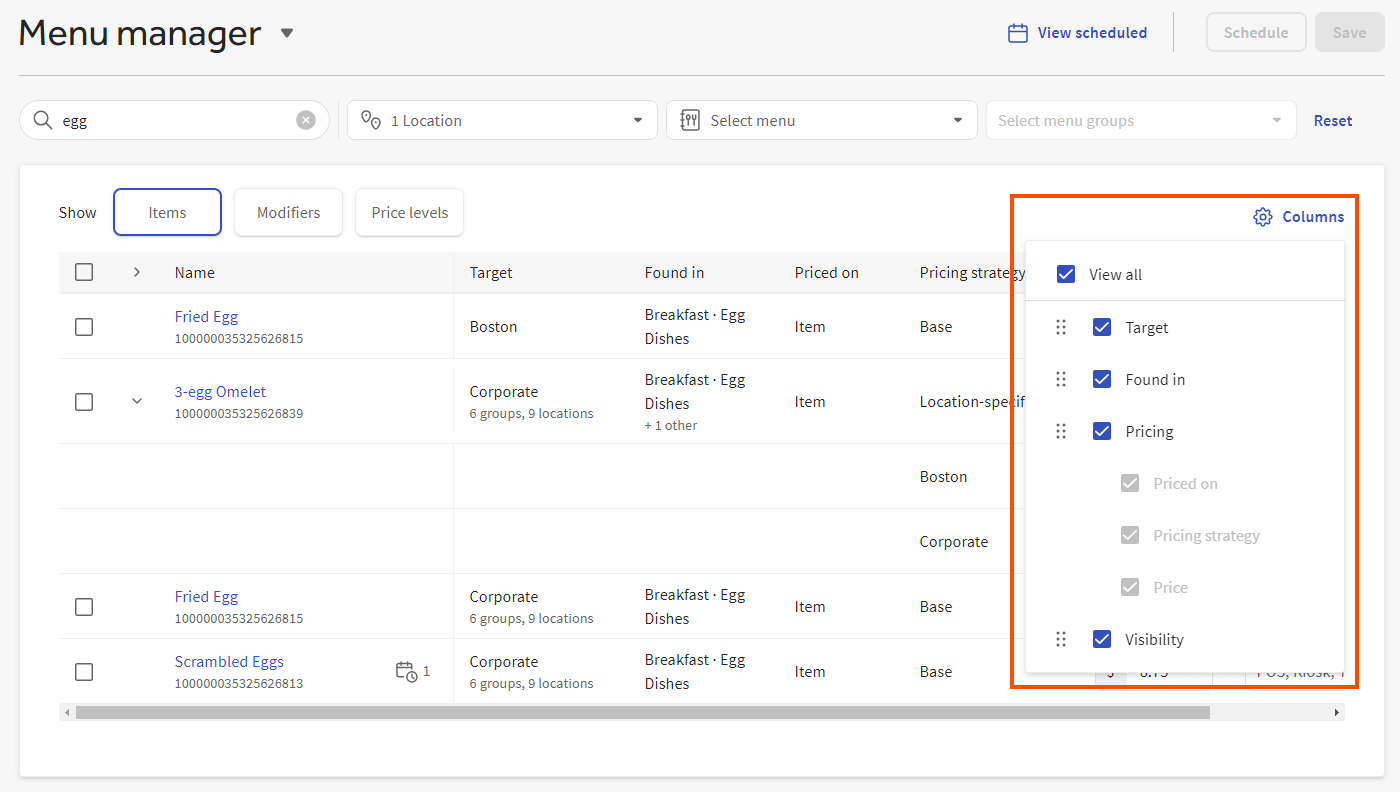
You can use the Columns selector to show, hide, and reorganize columns in the menu manager views.
To ensure that menu entity names are always visible, you cannot hide or move the Name column. Also, as you scroll to the right, the Name column remains fixed and visible as you scroll through the other columns.
|
Note |
|
The Columns selector is currently only available on the Items and Modifiers views. |
To show, hide, and reorganize columns
-
Select Columns. The columns selector appears.
-
To show all columns, select View all.
-
To show a specific column, select its check box. To hide a specific column, clear its check box.
Some columns are grouped together as a set and must be shown or hidden as a set. For example, the Price strategy, Priced on, and Price columns for menu items or modifiers are grouped together as a set called .
-
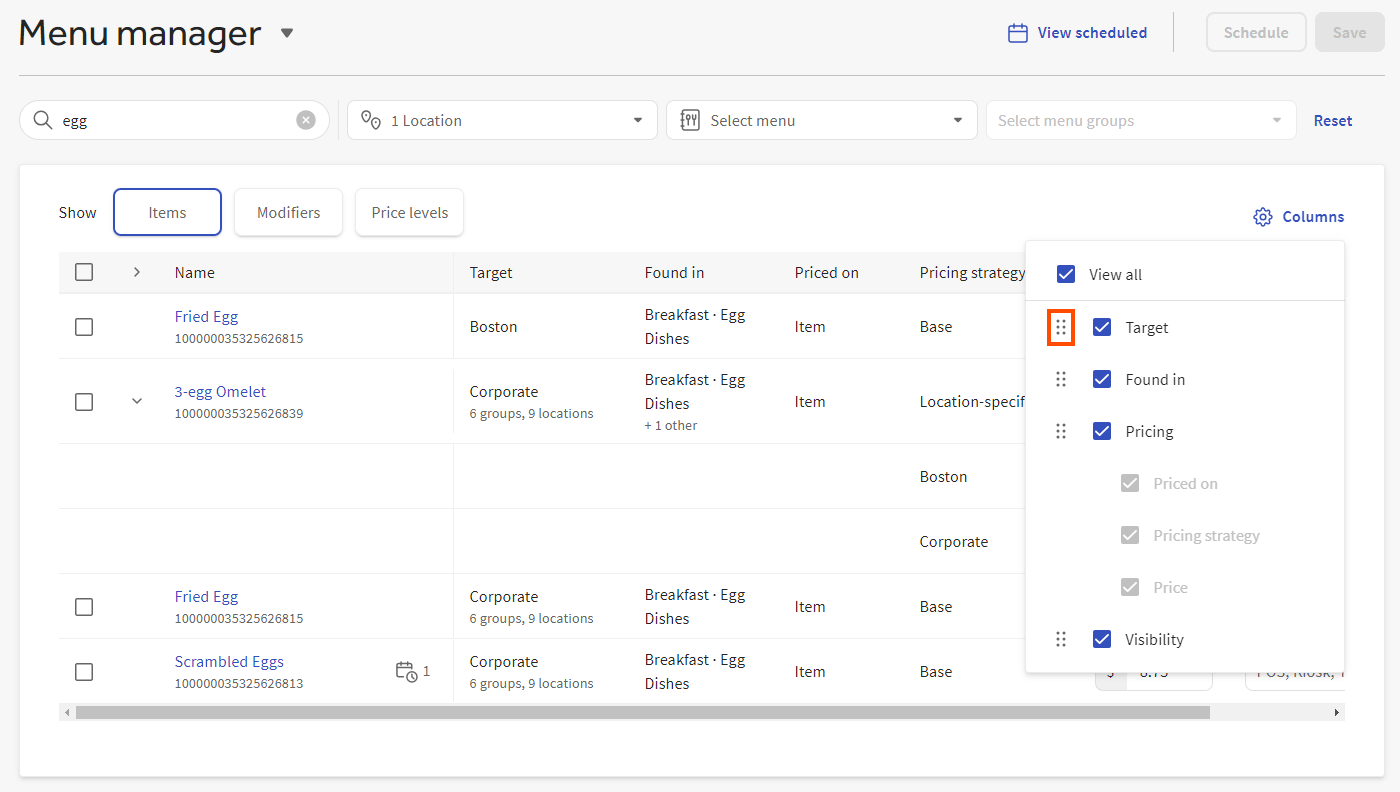
To reorder a column, select its reorder icon and drag it to its new location in the column list.
-
Select Columns again to close the columns selector.
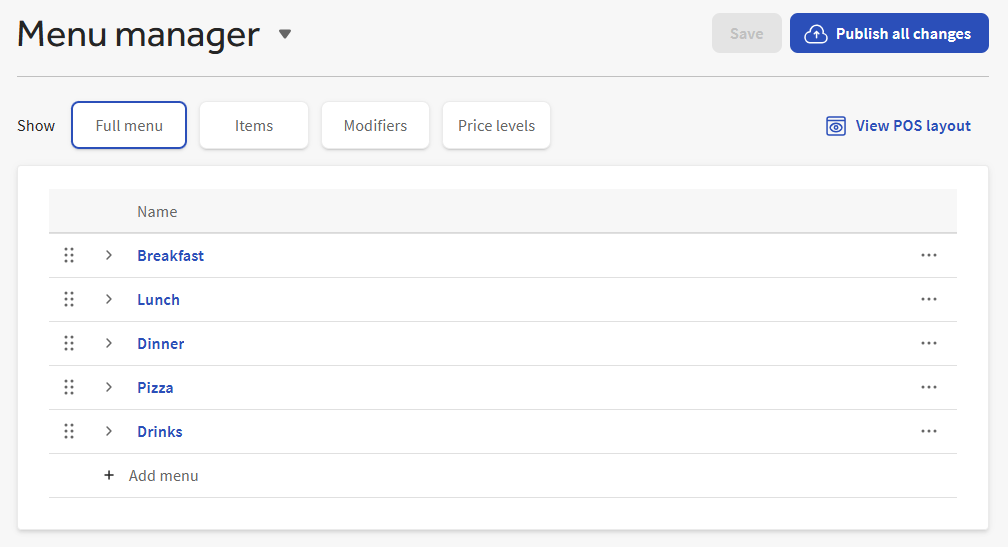
When you first open a menu manager view, the rows are collapsed. The illustration below shows the Full menu view when it is first opened:
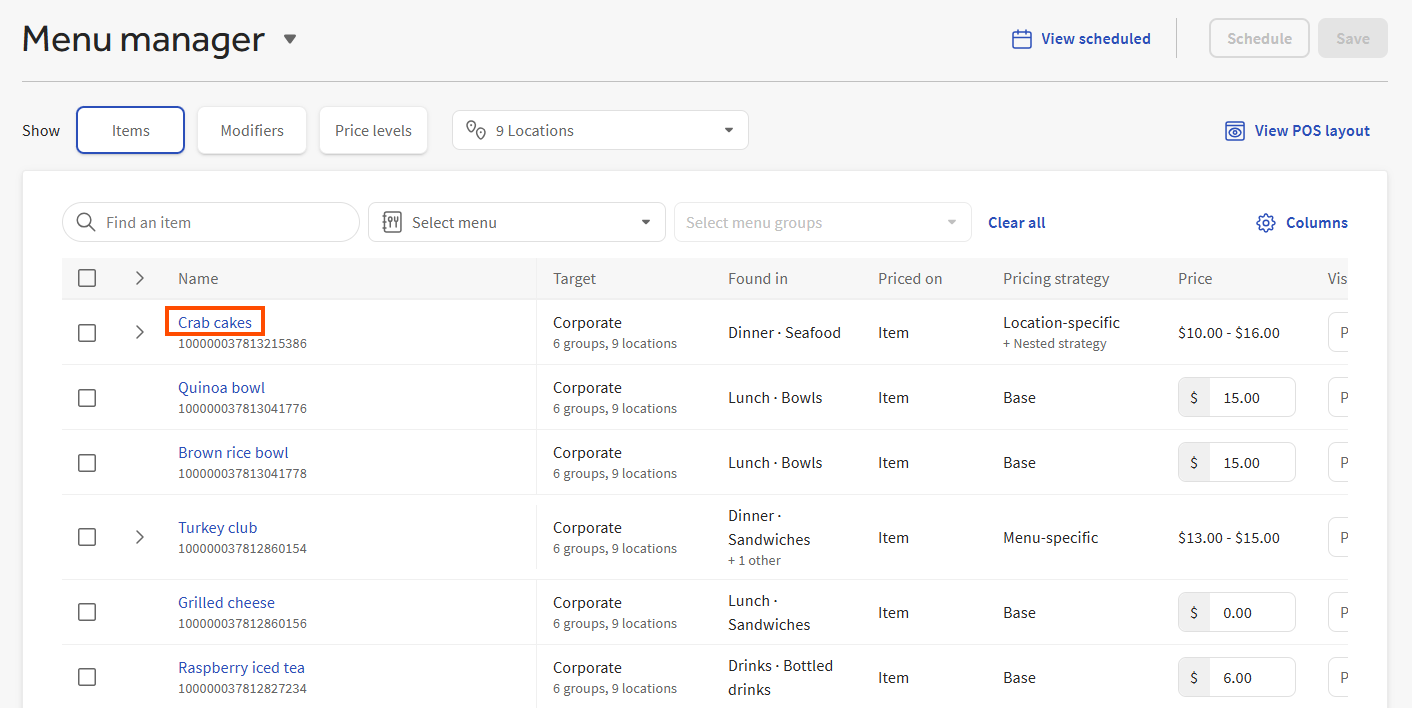
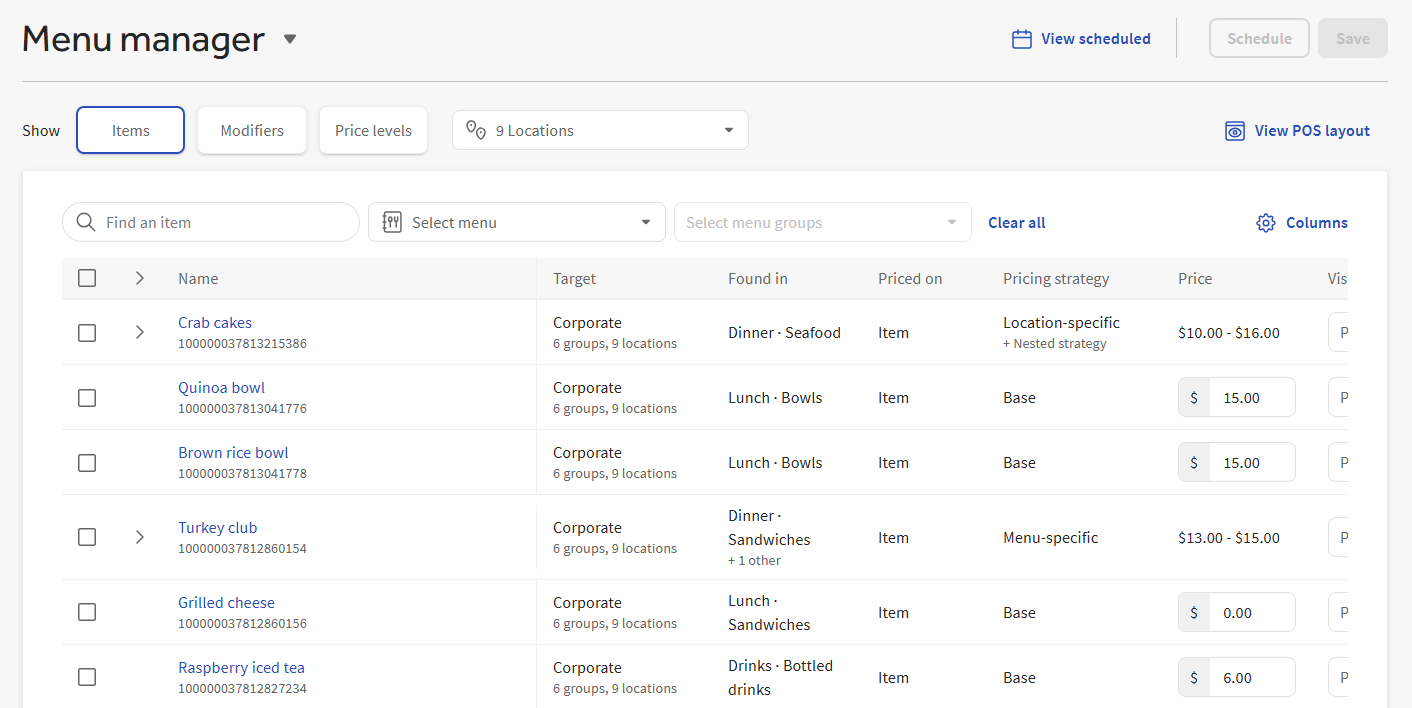
The illustration below shows the Items view when it is first opened:
Rows that can be expanded are indicated by the expand/collapse icon. Select a row's expand/collapse icon to expand the row. Select it again to collapse the row.
To expand or collapse all the rows, select the expand/collapse all icon:
|
Note |
|
Full menu view does not have the expand/collapse all icon. |
The menu manager has been designed to make menu data entry as efficient as possible. In particular, it makes use of the keyboard to allow for more rapid menu updates. This section provides more details.
When you add a new menu entity on the view, using one of the Add [entity type] buttons, a new row is added to the page with an empty text box where you can type the entity's name. After entering a name, you can do any of the following to finish creating the new entity:
-
Press the Enter key.
-
Select the checkmark next to the new entity's name.
-
Select anywhere outside the text box that contains the new entity's name.
Any of these actions completes the entering of the new entity and saves your changes. To abort the entering of the new entity, press the Esc key to remove the new entity's row.
If you have not entered a name for the new entity yet, any action (pressing Enter, pressing Esc, selecting the checkmark, or selecting anywhere outside the text box) aborts the entry process and removes the new entity's row.
To remove the entity's name but leave the new row in place so you can re-enter a name, select the X icon in the name field.
To assist you in quickly entering menu data, the Items, Modifiers, and Price levels views have the following keyboard shortcuts:
-
Use the Enter key to quickly move from one row to the next and Shift + Enter to move back to the previous row. You can use these keyboard shortcuts along with the row expanding icons to view the rows you want to edit and move between them more efficiently.
-
Use Ctrl + Z on Windows machines and command + Z on Macs to undo your changes.
On the Items, Modifiers, or Price levels view, you can quickly navigate to the classic details page for a menu entity by selecting its name. A new tab opens with the classic details page for the entity you selected.